
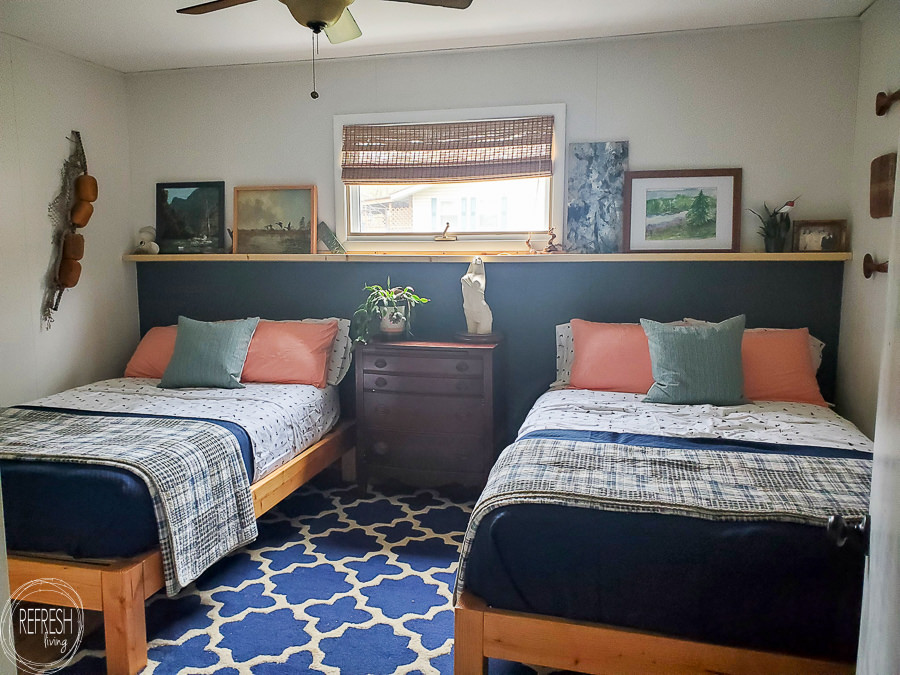
DIY Painted Headboard with a Wood Shelf
Making a headboard shelf and painting the wall underneath creates the look of a headboard for less than buying one.
It’s easy to create the look of a headboard by adding some paint to the wall, but adding an easy to build wood shelf creates a finished look. Adding pictures, objects, and frames to the top creates the visual look of a headboard without spending a lot of money.
I love figuring out ways to change up my decor without spending a lot of money (or time, if I’m being honest). The easier the project, the better, because the greater the likelihood that I’ll finish it before I get bored and want to move onto the next project.
Thankfully, this headboard shelf fits the bill – it’s both inexpensive and super easy to create a completely new look for your bedroom.
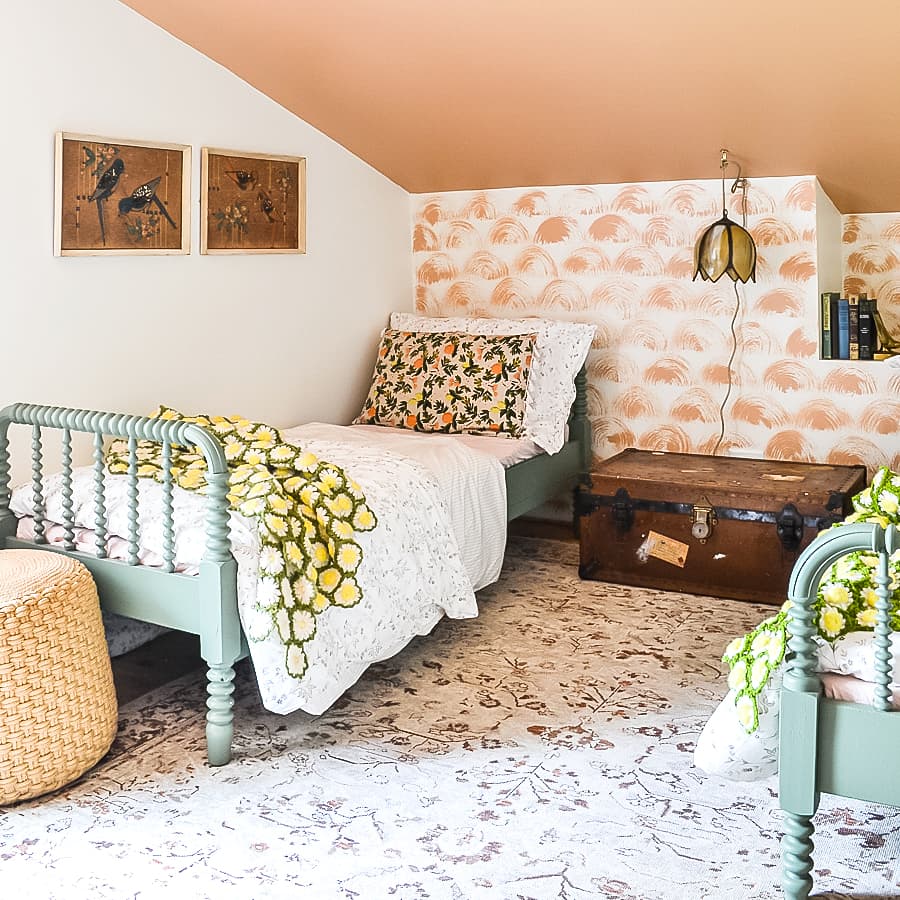
Of course, you can see that I created the headboard across the length of a wall that has two beds, but this look would work just as well with one bed along the wall. There are two parts to this project: painting the wall and building the shelf ledge.
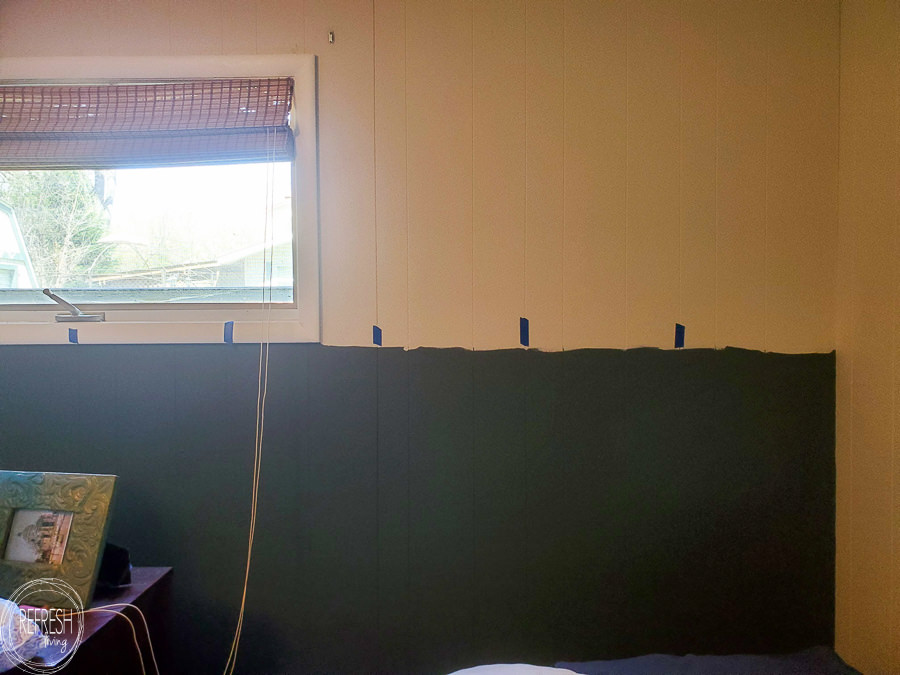
How to Paint a Headboard on the Wall
To decide the height of your headboard paint, it’s helpful to know the average height of headboards and use that as a guide. Of course, you can also just eyeball it and go with a height that looks right! Here’s a quick look at average headboard height (measured from the top of the mattress to the top of the headboard):
| Size of Bed | Height from top of mattress (average) |
|---|---|
| Twin | 14 inches |
| Full/Queen | 28 inches |
| King | 58 inches |

How to Build a Headboard Shelf
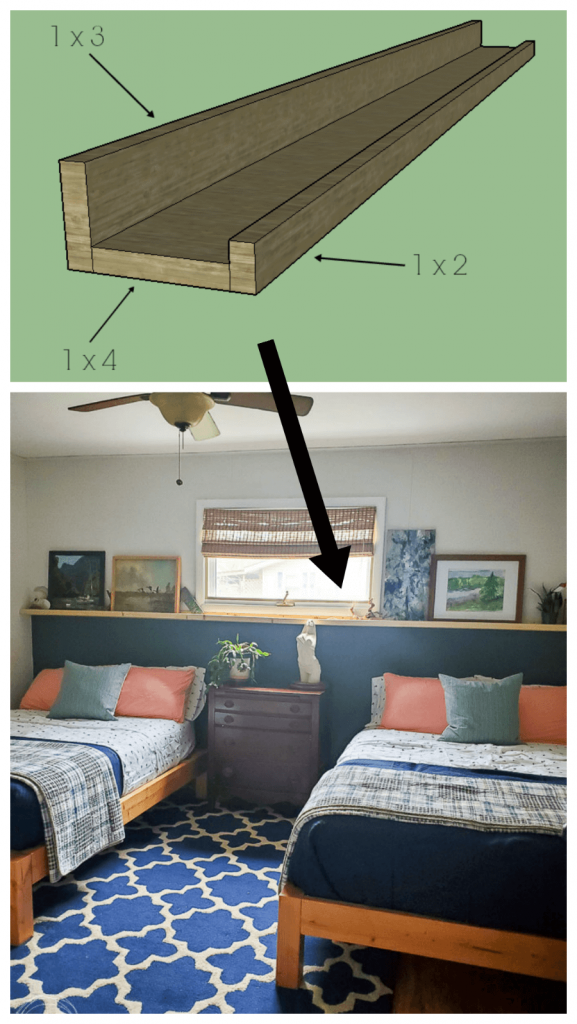
1. Sizes of lumber to build a headboard shelf
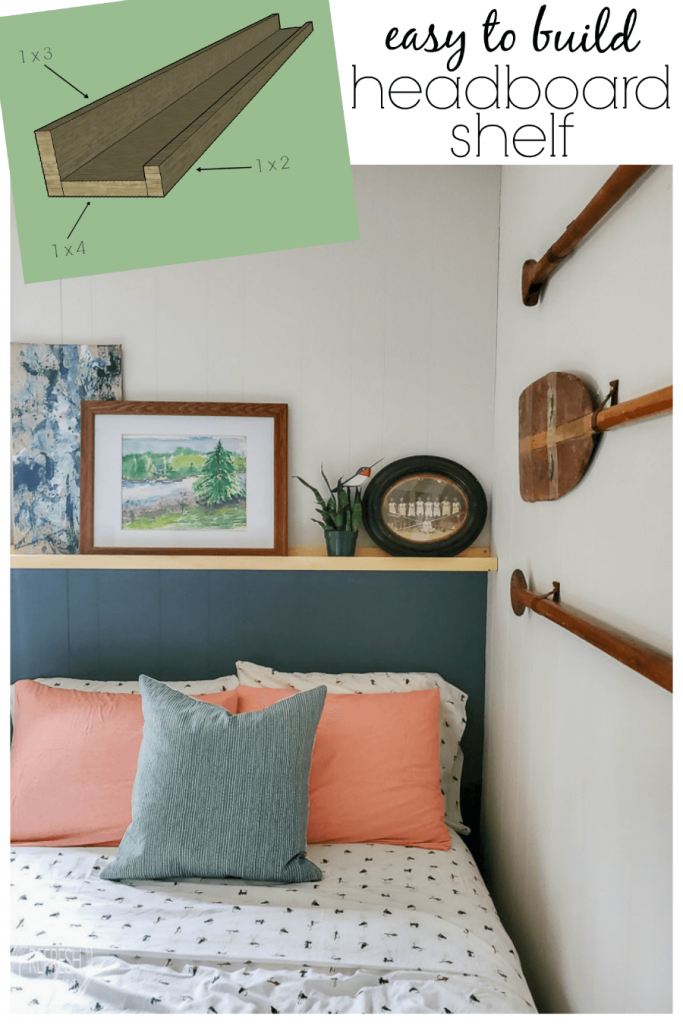
This headboard shelf is inexpensive because you only need a few narrow pieces of wood to build the shelf. Listed below are the sizes of lumber needed. To determine the length of the boards, measure the width of your wall that the headboard shelf will span across.
Sizes of Lumber needed
- 1×4 board
- 1×3 board
- 1×2 board
The length of my wall was longer than 12 feet (most hardware stores sell 12′ boards, some may have longer boards in stock), so I decided to join together pieces to create one long shelf that spanned the entire length of the wall.
To create a shelf with shorter boards that won’t span across your entire wall, simply cut the boards so that the seams do not fall at the same place along the shelf. If all the boards joined at the same place, you’d risk the integrity of the shelf and it could collapse at that place.
Because I alternated where the seams hit, I didn’t even need to join together the boards at those seams. I just attached all the boards together as shown below and it worked out just fine.
2. Glue and screw pieces together
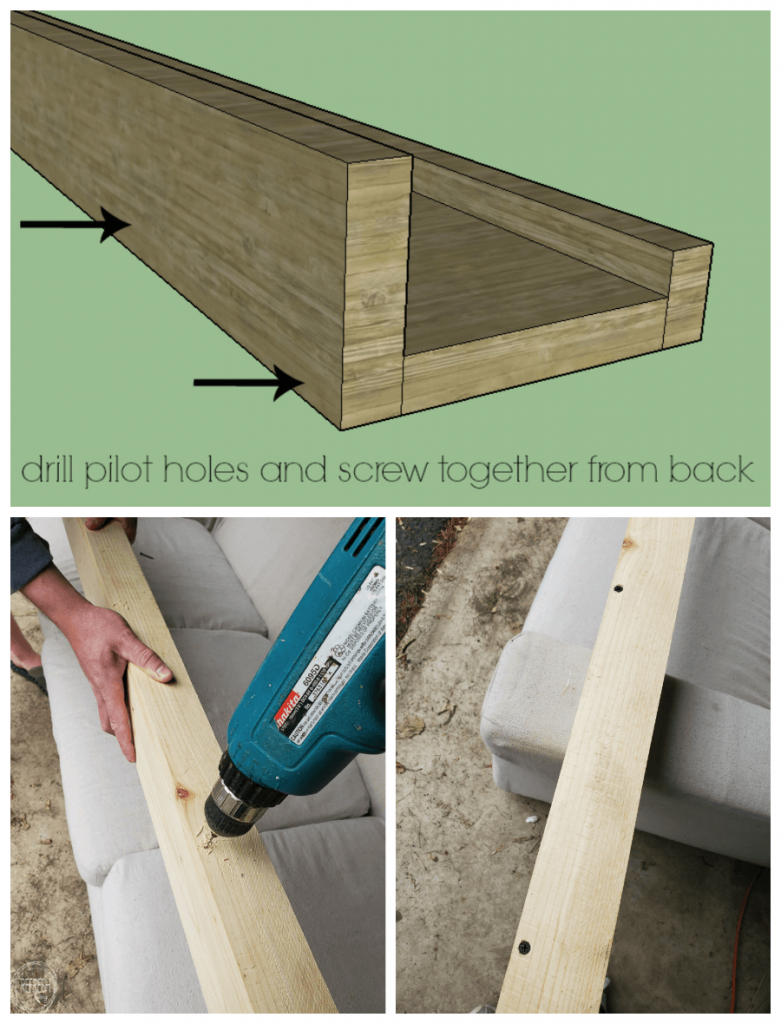
First, attach the 1×3 back board to the 1×4 board. To do this, pre-drill pilot holes every 12 inches or so on the back of the 1×3, apply wood glue between the boards, and then screw through the back board into the 1×4 board.
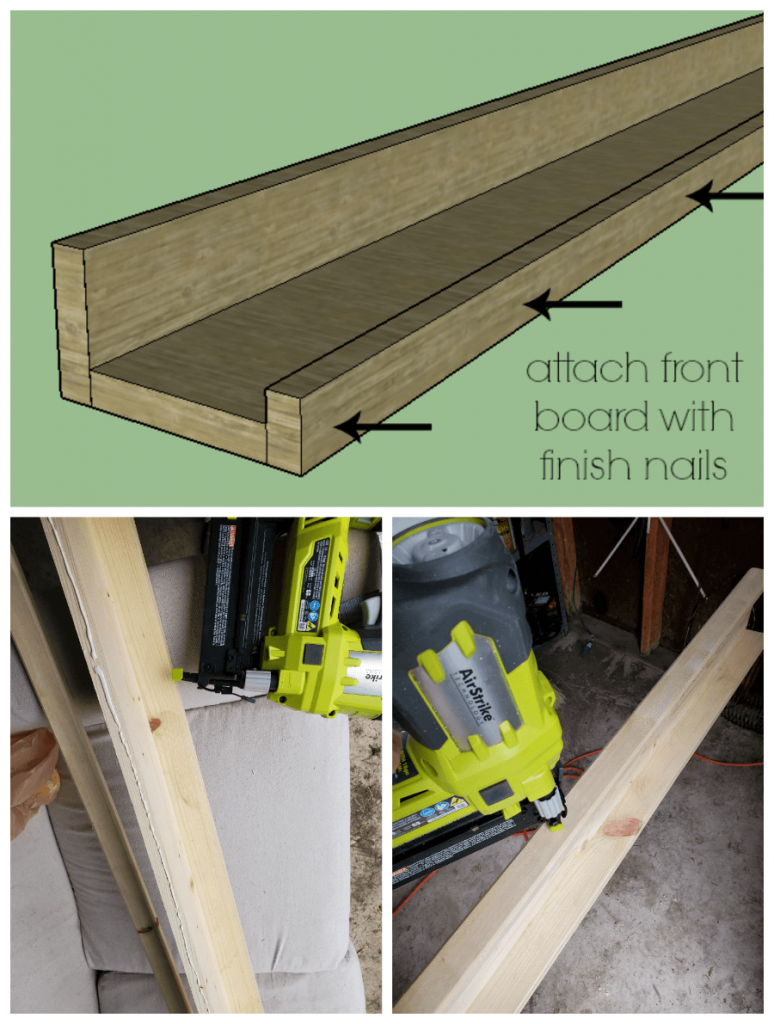
To attach the 1×2 to the front, apply wood glue between the boards and nail finish nails through the front of the 1×2 and into the 1×4 board.
Also apply wood glue between the seams when building the shelf that’s longer than 12 feet. Then, after it’s assembled, use wood filler to fill in any gaps between the seams.
In my particular case, I had to use the window as my mark for the height of the headboard shelf. Visually, it also have a logical cut off point in the room so I think it worked well.
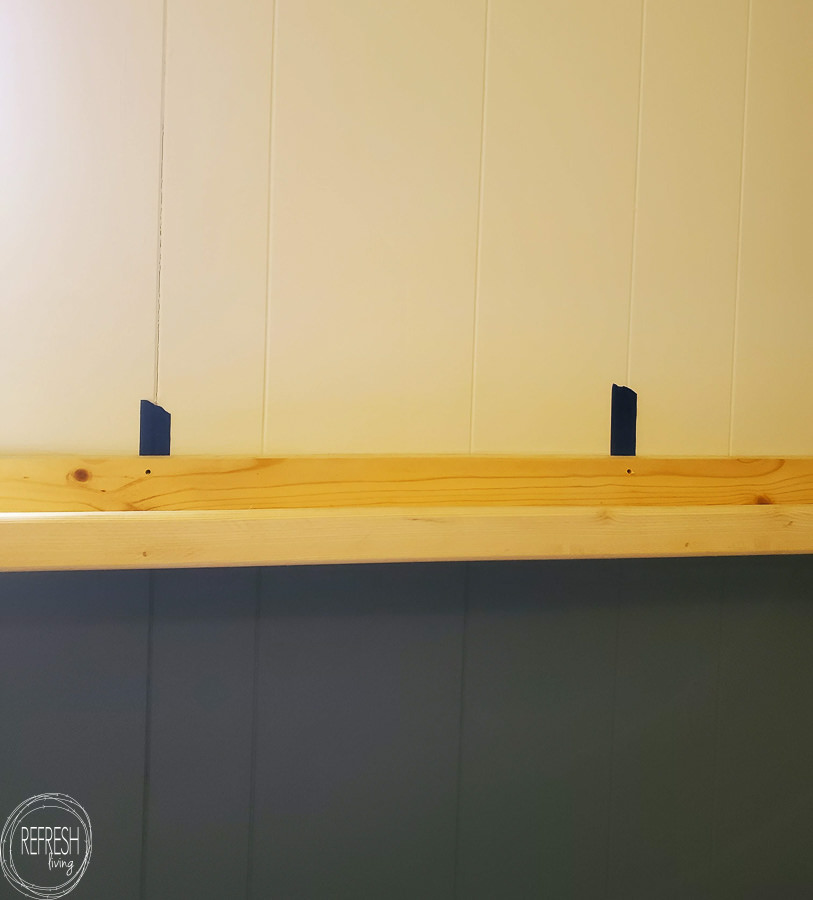
3. Attach the headboard shelf to the wall
First, use a stud finder to mark the studs in the wall with painter’s tape.
Using the tape as a guide, pre-drill holes into the shelf, and then attach the shelf to the wall with screws. No need to use construction adhesive here – as long as you are drilling into several studs in the wall, the shelf will be securely attached to the wall.
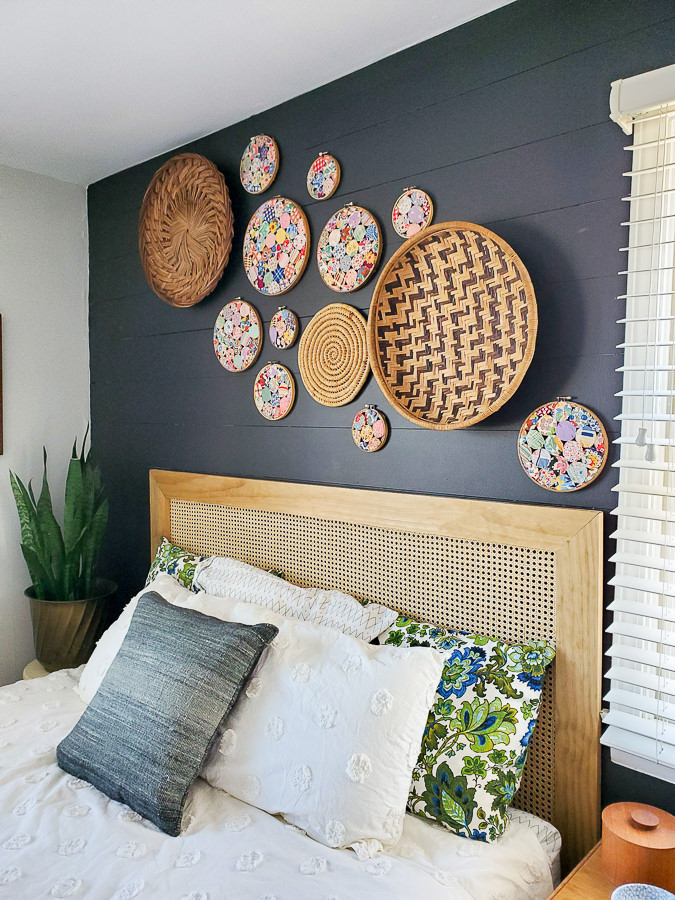
Styling a Headboard Shelf
To add height to a painted headboard with shelf, use artwork, plants, and other decor objects to draw the eye up but also balance out the full width of the shelf.

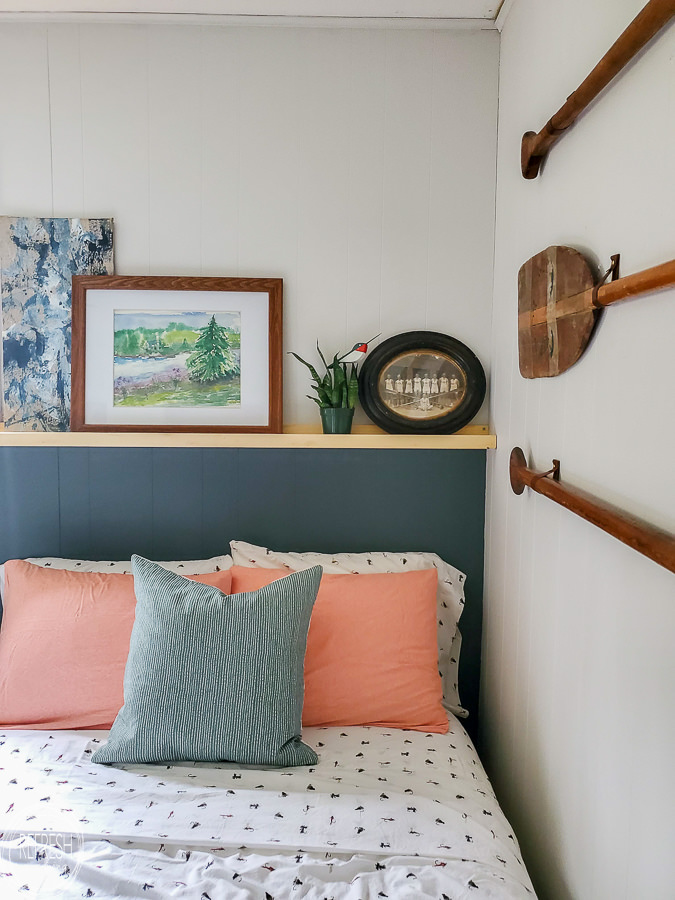
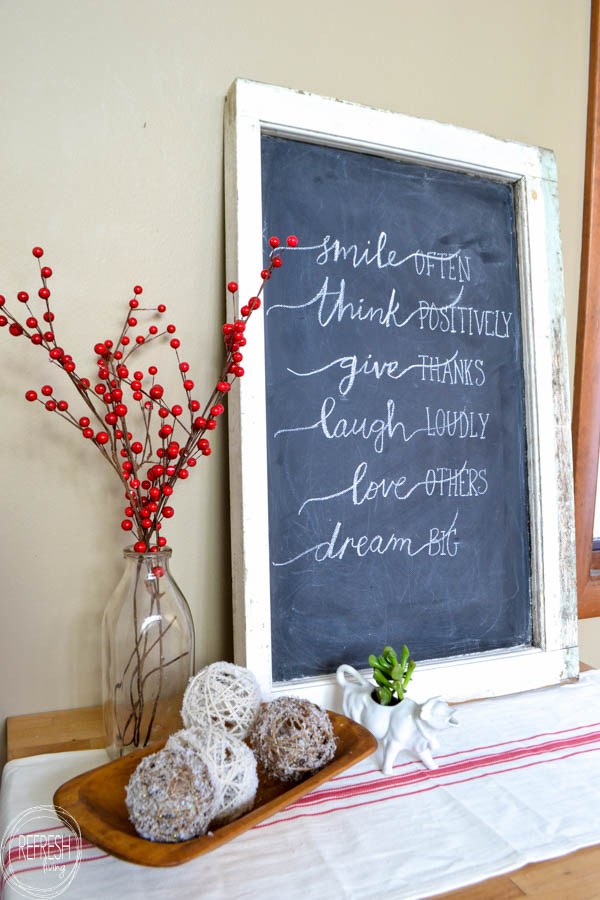
This was by far my favorite part of the process! It was fun to try to bring in my grandpa’s artwork, vary the height of objects, and still create the illusion of a headboard, drawing the eye up from the bed.
Whenever I’m styling shelves, I always turn to thrifted decor. Sometimes, it may take a little bit of time to fully curate the look and “fill” the shelf to your liking, but you will save money and create a unique look by collecting pieces over time.
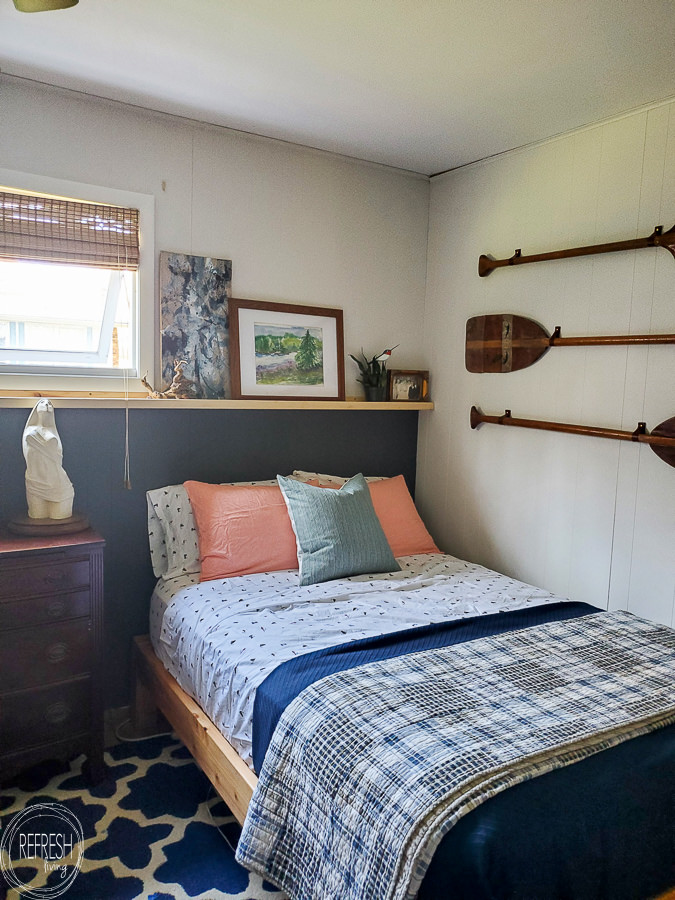
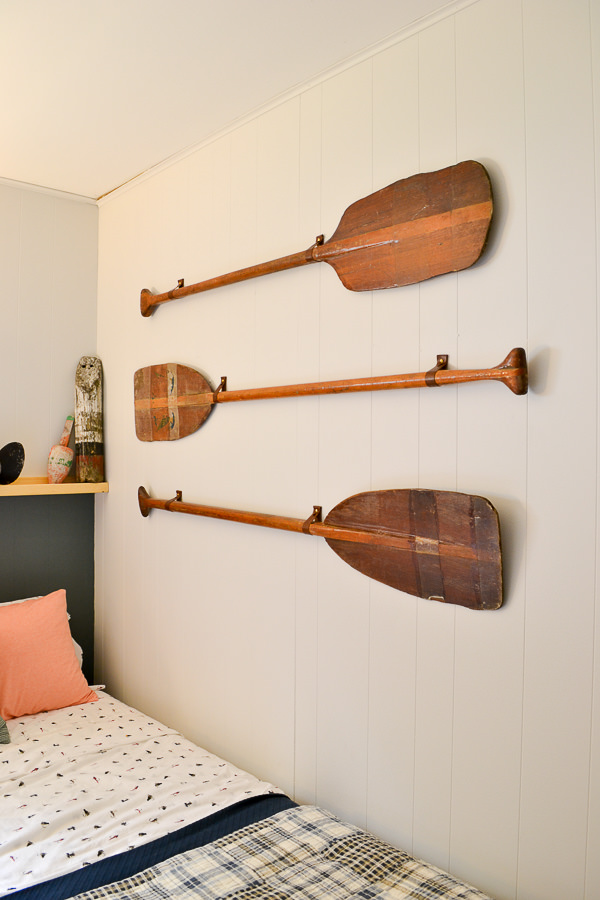
Looking for an easy yet decorative way to hang vintage oars on the wall? Here’s a full tutorial on hanging oars!
Because this room has two bed in it, building a headboard shelf DIY was much cheaper than buying (or building) two headboards. I think it still creates the visual look of a headboard, and allows me to display some of my favorite pieces of art and vintage goodies as well.
Using paint and a little bit of wood, I created a focal accent wall for very little money! I’ve rounded up a ton of other accent wall paint ideas if you like the idea of creating a statement wall without the cost or hassle!
Other Projects You Might Enjoy

Post by Jenny Leads
Jenny is the voice behind Refresh Living. She has a passion for helping people to create a home they love without spending a lot of money.

You’ve done such a good job! Thanks for sharing!! Do you recall the name of the paint color used under the shelf for the blog post “DIY headboard with painted shelf”? It looks similar to the one in your girls room, but I’m not sure. May you share what it is, please? Thanks in advance!!
Hi! Such a good eye that it’s similar to my daughter’s room! So it’s the same paint (Midnight in NY by Behr) but I lightened it with some extra white paint I had laying around in the same sheen. Most paint department workers at home depot will lighten any color for you. I would say I lightened by 1/4 of a shade (just based on estimation) Sorry I can’t give you an exact paint color!
Hi
Thanks for the details, I was looking into doing something like this! What type of wood did you use? And did you finish it (sand/stain/varnish)?
Hi Debora. I used a very basic pine wood. In fact, I think the 1×2 and 1×3 were from the furring strip area, which are bargain cuts. I did need to dig through the pile to find straight pieces without huge knots though. I finished it with clearcoat polyurethane. I didn’t use stain, but you could to darken up the color.