
Vintage Farmhouse Master Bedroom
For the last six weeks I’ve been busy working to update our master bedroom and I’m happy to say that I’m 90% finished and ready to reveal our new room! I love looking at room reveals and comparing before and after photos, so if you are anything like me in this way, you need to head on over to Calling it Home and check out the 200 other room transformations. But first, take a look at our bedroom makeover!
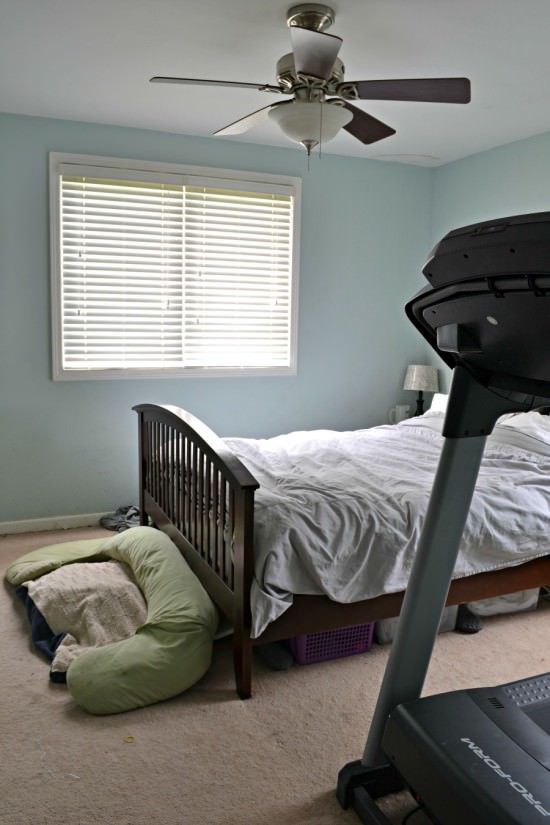
Here was our master bedroom back in April:
My initial plan for the space centered around a farmhouse feel with vintage touches:

There were only two projects I wasn’t able to complete in the six weeks. I planned to make my own wooden crates to slide into the cubby holes under the bed, but I simply ran out of time. All of the supplies are sitting in my garage, so I hope to finish those up soon, and then I can share my entire tutorial for my knock-off Pottery Barn bed. I also planned to install floating shelves in one awkward corner of the room, but to be honest with you, I completely forgot that I planned to make these until about week 4. By that time, I kind of knew there wasn’t a chance I was ever going to get them done in time, and I was right.
Welcome to our new bedroom!
I picked up this gorgeous antique chair at an estate sale for $10. The catch? It didn’t have a seat of any kind. I’ve never built a chair seat before, but I gave it a whirl and I’m quite proud of how it turned out.
I originally planned to keep the room completely neutral with white, beige, and gray, but I couldn’t resist adding in green. This shade of green is my ultimate favorite and it was amazing how much I already had tucked away in different parts of my house in this color.
Take this beautiful blanket my sister crocheted for me a few years ago. I’ve kept it in the nursery for all of these years, but I think it has now found a new home in my room!
When I found these vintage green fabrics on Etsy, I knew I needed them as part of my bedding. I made these pillowcase covers from a drop cloth and used the fabric to lie the inside.
You better believe I snagged up this hob nob milk glass lamp as soon as I saw it at the thrift store! The lampshade is one of the only items that stayed in the bedroom.
Two perfectly chippy, rustic stools are now our nightstands. Because the bed is so close to the wall on the left side, I knew I needed something small. I had these stools stashed in my garage to sell at an upcoming market, but when I remembered I had them, I knew they would work perfectly in the space. A little rope wrapped around the rungs and now they have extra storage space!
I’m sure you’ve seen it by now, but I also made our new storage bed and headboard! I’ll have a post up soon about how I built our bed to look like a Pottery Barn bed, but for a fraction of the price.
The headboard was an easy DIY project made gorgeous with the Esperanza Lace Tile stencil from Royal Design Studios. You can see the entire tutorial on how to make a headboard from plywood here
I also used the stencil to make these super inexpensive curtains from a $5 flat bed sheet. Thanks so much for following along with me as I transformed our room. I’m off to bed!!
Update!
I can this room ANOTHER facelift a few years later for less than $100. You can see the final reveal of my budget friendly master bedroom makeover here. Here’s a sneak peak of the room now:
Post by Jenny Leads
Jenny is the voice behind Refresh Living. She has a passion for helping people to create a home they love without spending a lot of money.
The new bedroom seems really serene – and I agree, the pops of green really go well in the space.
The crocheted throw blanket is so sweet. I love it in here. Such a pretty room!
Beautiful! It looks so calming and welcoming. I love the blanket your sister made and the tie pillows with the green stripes!
This is so comfy, cozy, and serene! I am in love with that DIY headboard (especially the fabric you chose)!! xx
Your room is both relaxing and oh-so-pretty! I could definitely see myself staying here for a while! Congrats and CHEERS to another room done!
Bravo Jenny! We love your headboard and all of your textiles. The green is so calm and soothing for a bedroom. Way to go!
Wow, you are so talented. Really looking forward to seeing the plans for the bed platform.
What a transformation! I love the bed – beautiful and functional! But those curtains….from a $5 sheet?! Those are some of the most beautiful curtains I’ve seen!
I love how light and bright it feels! The green accents add the perfect touch of color. Great space 🙂
Perfection! I love everything, I love the fact that you made the pillow cases! Those are very unique! I would start a etsy store and sell them! I buy them! Great job
Maria
Beautiful. Love, love the green.
beautiful redo
You did a beautiful job, Jenny! Your headboard is gorgous!! Such a pretty and bright space! xo
Love the touches of green in the room. You accomplished so much!
This room is beautiful! I love the green stripped fabric you found. So cute. I’m also lovin’ the wall color with the white shiplap. Amazing job Jenny!
Jenny, I love how bright and refreshing your master bedroom is. It was such a dramatic change from your before photos – I bet you just smile when you walk into this room now. Congrats on a job well done!
Real cool! Very nice work!
Thanks, Diane! I appreciate you leaving such a nice comment. 🙂
Wow…..your room is looking very relaxing because of the green colour. And I just loved the tie pillows with green strips. Thanks a lot for sharing this.
Thanks so much, Maithly! I found that vintage fabric online and once I did, I sort of just went with green for the room because of it. Clearly, it’s my favorite part of the room, too. 🙂
Beautiful job! You nailed it.
Thanks Rhonda!