
How to Make a Towel or Coat Rack using Vintage Items
You can attach antique glass door knobs or vintage faucet handles to a piece of wood to create a unique DIY towel hooks for the bathroom or a DIY coat rack.
If you’re out at a flea market, thrift store or garage sale and find beautiful glass door knobs or colorful vintage faucet handles, you can definitely upcycle them.
Glass knobs and faucet handles both make great hooks for hanging coats or towels. All you need is a piece of wood, some drill bits and large screws to make a DIY hanging rack.

How to Make a Storage Rack Using Antique Door knobs
You can attach vintage door knobs to a large piece of wood to make a custom coat rack or towel rack, but the method depends on the type of door knobs you have.
Styles of Vintage Glass Door Knobs
I am always on the look out for beautiful antique glass knobs to use on projects. In general, I’ve found two different main styles of glass door knobs. Some knobs have a circular opening and others have a square spindle. In the sections below, I’ll share how to attach each of these types of door knobs to a piece of wood.
Vintage Door Knob with Square Spindle
To create a hanging rack from door knobs with square spindles, you’ll need to use a dummy spindle. This bracket is screwed onto the face of the wood. Then, you’ll need to add a rosette cover to hide the metal plate. Finally, the antique door knob can be added onto the spindle. If necessary, use a bit of super glue to hold it in place.
Vintage door knob with round spindle
For antique knobs with round spindle holes, you can use a large bolt screw from the hardware store to attach the door knob to the piece of wood. To ensure you get the right size, bring the door knob to the store with you. Make sure it will screw into the knob and that the bolt is slightly longer than it will screw into the know (to compensate for the width of the wood).
How to Attach a Door Knob to Wood to Make a Coat/Towel Rack
The following tutorial is designed for using a bolt to attach a door knob with a round spindle hole.
Materials Needed:
- piece of wood cut to desired length
- large screw
- copper pipe (approximately 1.5″ per faucet handle)
- spade bit or forstner bit (slightly larger than size of the nut)
- drill bit (slightly larger than size of the galvanized bolt)
1. Space apart the knobs
Before drilling any holes to attach the knobs, first space the door knobs out evenly on the piece of wood. (Mark the spots on the back of the piece of wood.)
These measurements will depend entirely on the piece of wood and the number of knobs you are attaching. Use a pencil to mark the center point where each hole will be drilled.
2. Drill holes for door knobs
To drill the holes, you’ll need a large drill bit (slightly larger than the diameter of your bolt) and one spade bit (or fortsner bit) slightly larger than the diameter of the head of the bolt.
Find a spade bit or forstner bit that is larger than the head of the screw. Drill into the back of the board just deep enough for the screw head to sink into the wood without sticking out (less than 1/4″ should be fine here).
Then, use a drill bit that is slightly larger than the shaft of the screw to drill a hole all the way through the wood.
3. Attach the door knob
Insert the screw through the wood and into the glass knob. Hold the door knob and twist the screw in until the door knob is tight against the wood.
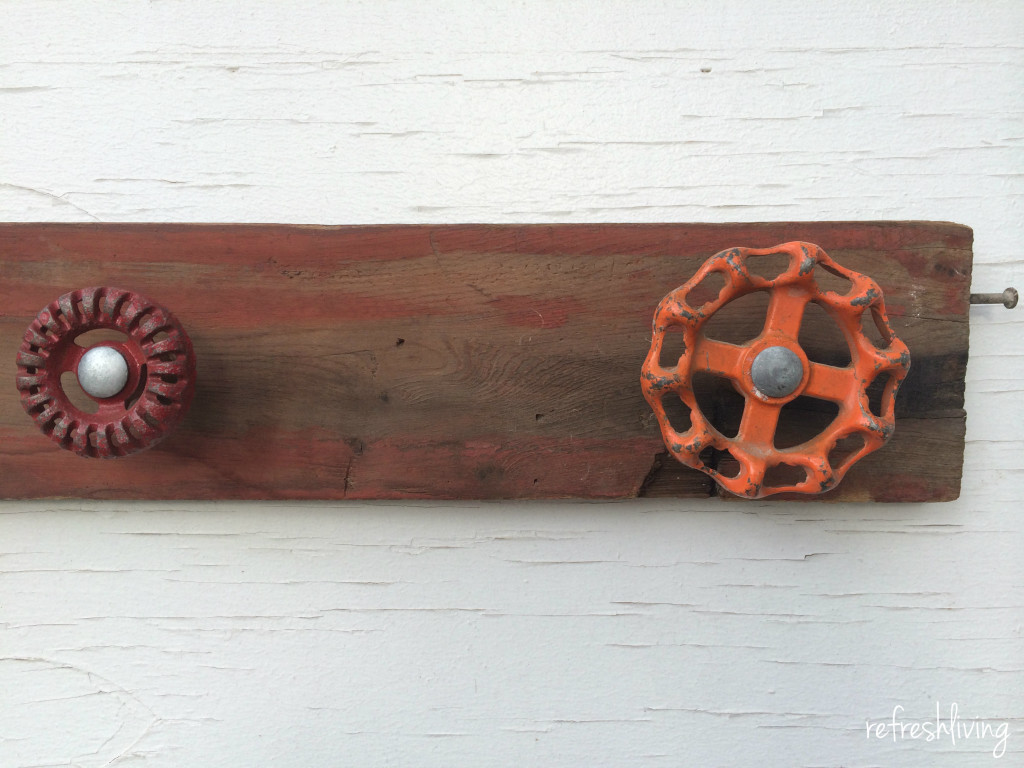
How to make a Hanging Rack out of Vintage Faucet Handles
The following directions will guide you on how to attach vintage faucet handles with holes in the middle of them to a piece of wood to make a towel rack.
Materials Needed:
- piece of wood cut to desired length
- 2.5″ galvanized bolts that will fit through all the faucet handles
- corresponding size of nuts
- copper pipe (approximately 1.5″ per faucet handle)
- spade bit or forstner bit (slightly larger than size of the nut)
- drill bit (slightly larger than size of the galvanized bolt)
1. Space apart the knobs
Before drilling any holes to attach the knobs, first space the door knobs out evenly on the piece of wood. (Mark the spots on the back of the piece of wood.)
These measurements will depend entirely on the piece of wood and the number of knobs you are attaching. Use a pencil to mark the center point where each hole will be drilled.
2. Drill holes and recessed holes in the wood
To drill the holes, you’ll need a large drill bit (slightly larger than the diameter of your bolt) and one spade bit (or fortsner bit) slightly larger than the diameter of the head of the bolt.
Use the spade bit or forstner bit to drill a recess into the back of the wood, just deep enough for the nut to sit flush inside the wood.
Use the drill bit to drill a hole through the center of the recess and through the piece of wood.
3. Attach faucet handles
Thread the bold through the front of the faucet handle. Place a piece of copper pipe around the shaft of the bolt. Then, place the bolt through the holes in the wood.
Use a nut on the back of the board to attach each bolt to the wood. The nut will sit inside the recessed hole which allows for the towel rack to sit flush against the wall when installed.
How to Hang the Towel/Coat Rack
Add keyhole hanging brackets to the back of the piece of wood, in the same places where the studs are in your wall.
Alternately, you can screw right through the face of the wood into the studs in your wall.
I hope this post was helpful to you in some way. It shows there’s still hope to reuse some of those pretty treasures you find when out thrifting!
Post by Jenny Leads
Jenny is the voice behind Refresh Living. She has a passion for helping people to create a home they love without spending a lot of money.
What a creative way to repurpose and reuse!
Thanks, CJ!
I love how detailed you were with your tutorial! Lots of great tips.
Thanks so much for linking up to Talk of the Town!
Pinning!
gail
Hi, Gail! Thanks so much for stopping by and sharing.
OH!! LOVE it! I happily pinned it!!
Thanks for sharing, Christine!
Jenny, this farmhouse towel rack came out beautiful! Love the color you used and the knobs and cleats.
Thanks for sharing this! All the best!