DIY Spring Wreath
This is an easy way to bring some spring cheer to your front door. A DIY spring wreath made using a woven plate charger that’s easy to find at the thrift store. Add some wood lettering with a decoupaged napkin from the Dollar Tree and some spring floral sprigs and you have a spring decoration that costs only about $5 to make.

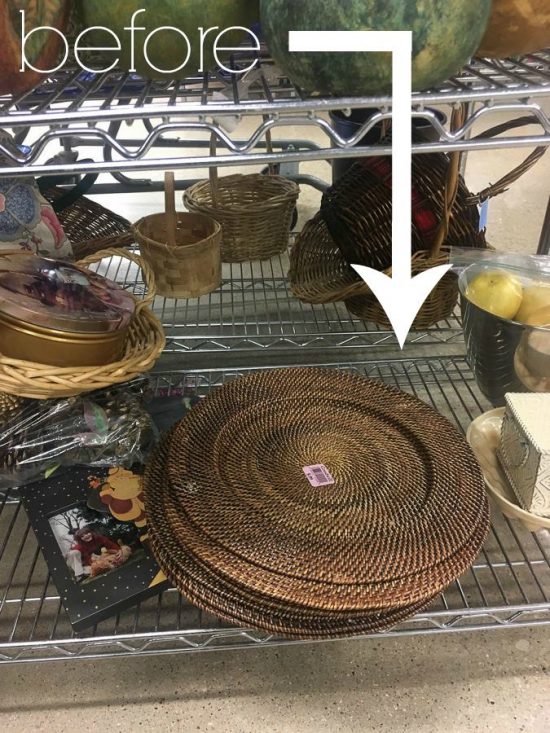
I found this stack of woven plate chargers at a thrift store a couple of weeks ago and, unlike most items I find while second-hand shopping, I knew exactly what I planned to do with one of them. It was the perfect size for a small scale door wreath.
I’ve been trying to find creative ways to reuse old objects as bases for wreaths, but I still hadn’t made one for spring, so my plate charger find proved to be the perfect opportunity to put one together.

This post contains affiliate links. Feel free to read my full disclosure policy here.
Supplies Needed to Make a DIY Spring Wreath
- patterned scrapbook paper
- wooden saying cut out
- ModPodge
- faux florals
- floral tape
- hot glue
- twine
Steps to Make the Wreath
I used some yellow and white faux flowers I bought on clearance at the end of last season to decorate my wreath, but the possibilities are endless on the types of flowers and greenery you could use to design your own. I used floral tape to combine all the small stems, and then wrapped the place where they were joined with colored twine. A little bit of hot glue on the back of the twine wrap holds all of the flowers in place.


To make the little twine florets, I just spiraled them in a circle, adding a dab of hot glue around the outside edge as I continued wrapping to hold everything in place.

For the phrase, I just bought a wooden “welcome” cut out from Jo Ann fabrics for $2. I also saw metal sayings that would be the perfect size for a wreath as well. To update the wood cut out, I brushed ModPodge on the front of it and attached the patterned paper.
After letting it dry completely (an important step or your paper might rip), I used an Exacto knife to cut around the wooden cut out. I found it to be easiest to lay the wood paper side down on a piece of thick cardboard or foam board, and to cut around the shape from the back.

In the video within this post, you’ll see I used a different technique by decoupaging a napkin onto a wood cutout. Either way works great to add some color to wood lettering!
Some hot glue held the welcome piece in place, as well as a piece of twine that I knotted on both ends at the top for the hanger.

The entire DIY spring wreath took me less than 20 minutes (excluding the drying time of the glue). It was an easy and inexpensive project that adds a touch of spring cheer to my front door!

Let’s be honest. This isn’t just a spring wreath – it’s a spring AND summer wreath, because I know I’m probably going to get lazy and leave it up well past the summer months. It works though, right?

Like it? Pin it. (Thank you!)

Since we’re talking about inexpensive wreath ideas, here are the other strange ways I’ve decorated my front door for different holidays.

Post by Jenny Leads
Jenny is the voice behind Refresh Living. She has a passion for helping people to create a home they love without spending a lot of money.
Very pretty!
So pretty! Love the twine flowers. Visiting from Inspiration Monday party.
love this idea!
b
Very creative and very pretty. Thanks for the inspiration, and sharing on Sunday’s Best.
How fun and creative! Thanks for sharing with SYC.
hugs,
Jann