
How to Paint a Room (The Correct Order of Operations)
The best order to paint a room that creates the easiest and cleanest paint job.
According to professional painters, there is a correct order in which to paint a room. The funny thing is, if you look on the first page of Google, the steps are listed in a different order on each site (including my own). I even asked a few professional and experienced painters their preferred order, and each person had a slightly different painting order!
So rather than sharing with you the “correct” order to paint a room, I’m going to give you my personal favorite order for painting a room as a DIY homeowner (while still using the advice of the pros and my experience of painting well over 50 different rooms).
This order gives beautiful results while also being the most efficient and the most forgiving for DIY painters looking to achieve a professional looking paint job.
Using this order to paint a room may also save you the hassle of using painter’s tape (or at the very least minimize the number of steps you’ll need to use painter’s tape in).
I prefer to paint a room without painter’s tape and this is the only order I will paint in to give the cleanest lines without tape.
This post contains affiliate links. Feel free to read my full disclosure policy here.
Supplies you’ll need to paint your room like a pro:
- 2-1/2″ angled sash brush (for trim and cutting in)
- Painter’s tape
- 3/8″ nap roller cover, roller frame, and paint tray
- Ceiling paint
- Wall paint (you can see all of Behr’s paint colors here)
- Baseboard and trim paint (if you are painting it)
- Drop cloth
Steps to Painting a Room
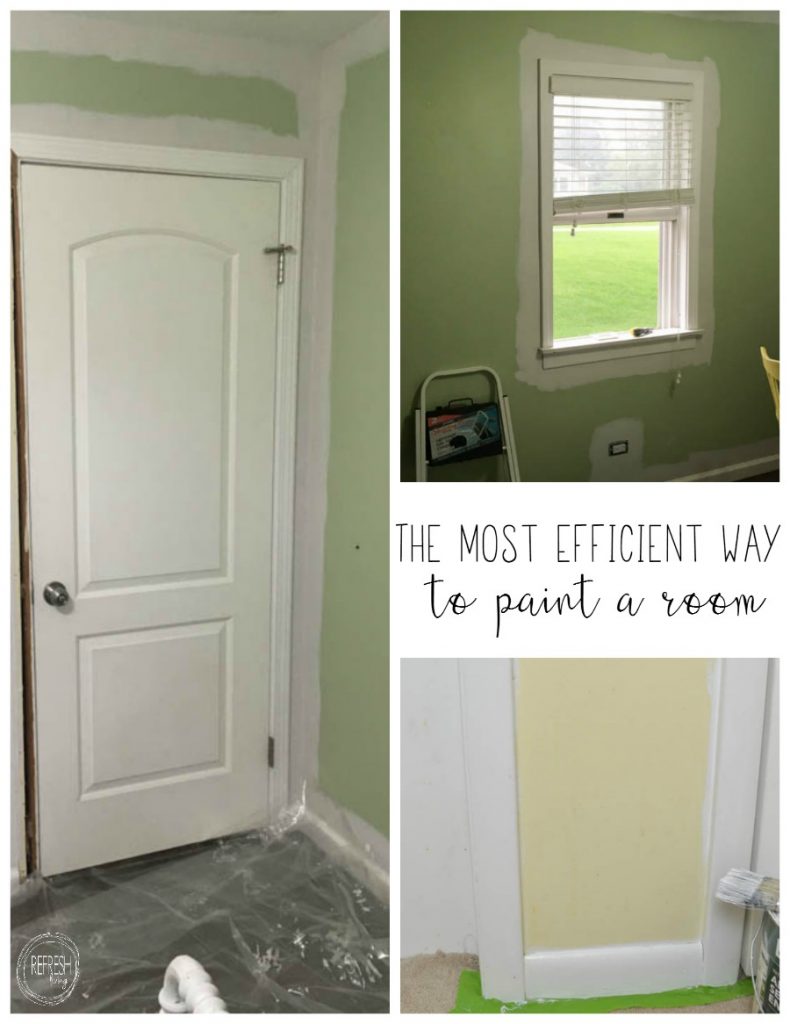
1. Paint the Ceiling
I’ll be honest, this is my least favorite step in painting a room, and I don’t do it every time I change the wall color of a room, but there are definitely times when it just needs to be done.
You’ll want to paint it first because it’s the area in which you have the least control when rolling, and it’s okay if you get a little paint on the walls, because they are just going to be painted anyway!

BEST Type of Paint to Use on the Ceiling
Ceiling paint is your best option for painting a ceiling. Regular wall paint can be used, but ceiling paint is thicker and made to roll on without as many drips or splatters as regular paint. Most brands of ceiling paint can be tinted to any color you’d like!
Usually ceiling paint comes in a flat sheen because it doesn’t reflect light and draw attention to the ceiling. Of course, if you’re going for a different look, you can use wall paint in any sheen to paint your ceilings.
If you are painting white over a white ceiling to freshen it up, you may want to opt for tinted ceiling paint. It goes on slightly pink or purple, but then dries white. This helps you to see where you have already painted (which can be tough when you’re painting white over white).
2. Paint the Trim and Baseboards
Painting your trim before your walls is much easier than doing it the other way around. By painting your trim first, it allows you the flexibility of getting a little bit of paint on the wall (because you’ll just end up painting over it).
Additionally, it’s much easier to cut in wall paint against trim cleanly than it is to cut trim paint in cleanly against the wall (due to the small lip on the top of most pieces of trim).
Best Type of Paint to Use on Trim
It’s so important to choose the right type of paint for baseboards and trim, because they get a lot of wear and tear.
Oil-based paint with give the strongest finish, but with the high level of VOCs and the messy clean up, it’s just not worth using for me. Plus, water-based paint quality has come a long way in the last several years, so many of these paints finish similarly to oil-based paints.
My favorite type of paint for trim is Alkyd Enamel paint. Every major paint manufacturer makes this paint now. It’s easy to apply, levels beautifully (meaning you won’t see brush strokes), dries to a durable, cleanable finish, and cleans up with water.
I wrote a full post detailing the specific brands that make alkyd paint, where it’s sold, and the price of each one. (The post is specific to cabinets, but it’s the same paint I use on trim as well.)
3. Cut in Wall Paint
You basically have two options when it comes to cutting in the wall color around your trim, baseboards, and ceiling. You can use painter’s tape, or you can cut in by hand.
I started off using painter’s tape because I was so scared of ruining my nicely painted ceiling and baseboards, but now I rarely use painter’s tape. It adds quite a bit more time to the process, and now that I’ve figured out the correct brush stroke for cutting in (“Let your brush do all the work,” my dad has told me, more than once…) I find that I can paint it by hand and achieve the same look as if I used tape.
Cutting in does take practice, though. If you think you have a steady hand, or want to give it a go without the tape, I would start around an area of trim, and give it a practice paint job. If you feel comfortable, continue on. If not, grab that painter’s tape. No harm, no foul!
The one place where I would recommend painter’s tape, especially if you are just starting out, is to use it on your ceiling when cutting in your wall color at the top. Ceiling paint gives a very flat/matte finish, and it’s more difficult to clean off “oopsy” spots, especially if they are a dark color.
However, if you get a little wall paint on your trim while cutting in, you can easily wipe it off with a damp rag. (I actually have on in my hands at all times when cutting in!)
If you do choose to cut in by hand, be sure you are using an angled sash brush. It will help you out tremendously!
Best Type of Paint for Walls
When you purchase wall paint from any home improvement or paint store, you’ll see a range of different qualities of paint. Although it pains me as a budget DIYer to say this, there really is a difference between the different grades of paint.
The more expensive, better quality paints really do give superior coverage. With that being said, any quality of paint will cover your walls, you might just need additional coats with some of lower grades of paint.
If you’re painting over a darker color with a lighter one, it will save you some money and time in the long run to just buy one of the higher levels of paint. I had the task of painting over a massive red wall in our living room (notoriously the most different color to paint over), and I did a full comparison of the difference in the cheapest and more expensive paint within the same brand.
If you’re wondering about the differences between sheens, like flat, matte, eggshell, satin, semi-gloss, and gloss, you can read about the differences here.
4. Roll on Wall Paint
This step is easy, and by far the most fun in the process, because your new wall color is finally on the wall!
Attaching a broom pole to the end of your roller frame, or buying one with a telescoping arm, will help the process to go a bit faster and give you a little extra leverage when rolling.
When rolling the wall paint, start at the bottom of the wall and roll up in one sweeping motion. Then, roll down the wall, angled slightly out from what you just rolled. You always want to maintain a wet edge on the edge of your paint that was just applied and then roll over that wet edge with the next stroke.
5. Paint a Second Coat (if needed)
Painting a second coat is usually fairly quick, but it’s usually needed when painting a room. Sometimes, you’ll need to cut in a second coat along the edges of the wall (depending on the color you are painting over and with, as well as the quality of paint you are using).
When cutting in the second coat, there’s not need to get right up to the ceiling or trim this time, so it goes much faster than the first coat.
Then, roll on the second coat of wall paint. This will cover any small areas that were showing through on the first coat.
Occasionally, you may not need to paint a second coat on your walls. If you purchased the highest grade of paint at a store it’s typically marketed as “one-coat coverage”. I find this to the true when you’re painting over a similar color. If you’re going dark to light or even vice versa, you’ll most likely need two coats. Thankfully, the second is always quick!
Frequently Asked Questions:
Do you paint the ceiling or walls first?
It’s recommended to paint the ceiling of a room before painting the walls. This eliminates getting splatter on freshly painted walls. Additionally, you don’t need to worry if your ceiling paint roller accidentally hits the wall (which is easy to do). Plus, it’s way easier to cut in paint on the walls against a freshly painted ceiling than it is to cut in ceiling paint against freshly painted walls.
Do you paint trim or walls first in a room?
Painting the trim of your room first is the easiest way to go. This allows you to freehand paint your trim (without using painter’s tape), because it you get some trim paint on the wall, it will just be painted over. Plus, it’s easier to cut in wall paint than it is to cut in paint on trim, so painting the trim first might save you from having to use painter’s tape at all.
Do you need to use painter’s tape when painting a room?
It’s definitely possible to avoid using painter’s tape when painting the walls, trim and ceiling of the room. The reason I love the order of painting a room I shared in this post is because it’s the most forgiving way to paint a room without needing painter’s tape. If you have some experience cutting in paint cleanly and follow the order I listed, I think you’ll find you won’t need to use painter’s tape.
Of course, if you’re new to painting you may want to use painter’s tape when painting the wall paint color. If you use the same step ordered I listed above, that would mean you only need to use painter’s tape on the ceiling and the trim when you’re painting the walls.
It’s amazing how paint can transform a room!
Post by Jenny Leads
Jenny is the voice behind Refresh Living. She has a passion for helping people to create a home they love without spending a lot of money.
What color did you use for your walls in your ‘after’ picture? I love it!
Hi Anna. Sorry it took me so long to respond – I had to search for the paint can. 🙂 It’s Spun Wool by Behr.
Great description on how to paint a room! Very well written and easy to follow. Will def follow to read some more tips, thanks!!!
I’m glad it was helpful, Patti! Thanks for following along.
So you won’t have to search for a can to be reminded of the colors you used, take that handy painters tape and write the color used on a piece. Stick that written on tape under your light switch cover. I use sharpie to write the color.
I love that idea! I can’t tell you how many rooms I have no idea what color paint I used because I don’t have a system for recording it.
A quality 1/2 ” roller cover is much better than a 3/8. It will help where walls have imperfections and still have a good nap as it compresses during use.
I am a first time painter. I have removed wall paper and have needed to treat walls with Guards. Two questions……I have noticed the baseboard paint is peeling in many areas (not sure if due to steaming off wallpaper or something else). What should I do about that??? I surely can’t paint over peeling paint. I can pull the peeling paint off but not entirely. HELP!
Secondly, thinking of using a texturized roller to help cover the imperfections due to wall paper removal. What is your opinion on that and if used, should I use tape so I can roll closer than I could with cutting in?
Thank you!!
Hi Mary! Oh, the joys of removing wall paper – it can be such a tedious process! I know what you mean that wallpaper can leave behind some texture. I do think you could use a roller with texture which would just leave that texture on the walls, thus hiding the texture you don’t want. 🙂 When I removed mine, I used an orbital sander to smooth down those spots before painting, which also works.
As for the peeling paint on the baseboards, I bet you’re right that it could be due to the steaming. I would try to see if I could sand away anything that’s peeling and then just paint over it. There’s also a primer that’s called Peel Stop that does work to stop peeling paint pretty well and then you can just paint over that. I think I’d try to lightly sand to get off any really loose paint and then use the Peel Stop, and then paint over it.
Do any of these tips change in regard to a textured wall. I want to repaint my white walls with a washable white (any recommendations for paint) but my walls are textured. Thoughts.
I would still use the same order for textured walls except I would use painter’s tape when painting the baseboards and trim (if you’re planning to paint them). It will be more difficult to cleanly cut in the trim with the textured walls. As far as paint goes, I would recommend one of the mid-high levels of paint at any home improvement stores. The cheapest levels of paint just don’t wash as well. In my opinion, the my favorite wall paint is Sherwin Williams Emerald Acrylic Latex, however I rarely buy it because it’s more expensive. The higher grades of paint at any home improvement store are almost just as good. But, if SHerwin WIlliams is running a 40% off sale (which they seem to often do), I would recommend that paint!
Hi. I have painted quite a few rooms also and this is the exact order I paint in (despite being advised otherwise). One thing I’ve seen recently (in a Facebook reel?), that I’m going to try next time, is dragging a spackle knife edge or penny along the edge of the ceiling/wall interface to make cutting in more precise. Some of my rooms have been painted frequently enough that there is a curved edge of paint at the ceiling.