
Create the Look of Wallpaper with Paint
Looking to mimic the look of wallpaper without spending a lot of money? This DIY painting technique is easy and gives the look of wallpaper; all you need is a paintbrush and wall paint!
I love the look of faux, hand painted wallpaper techniques I’ve seen floating around Pinterest and Instagram lately. They truly look like wallpaper, but instead of spending lots of money on wallpaper, you can use paint brushes or sponges to repeat a pattern that, once it’s done, looks just like wallpaper.
Have you seen the price of wallpaper, by the way? I always think I want to give it a try in a room, and then I search for patterns I like, look over the price, and quickly change my mind. So this DIY project resulted from my budget-friendly decorating tendencies, and some fun experimentation with a paintbrush.
Plus, I’ve also rounded up over 25 other rooms with amazing accent wall ideas with paint.
Steps to Paint a Patterned Wall to Look Like Wallpaper
1. Tape off surrounding walls

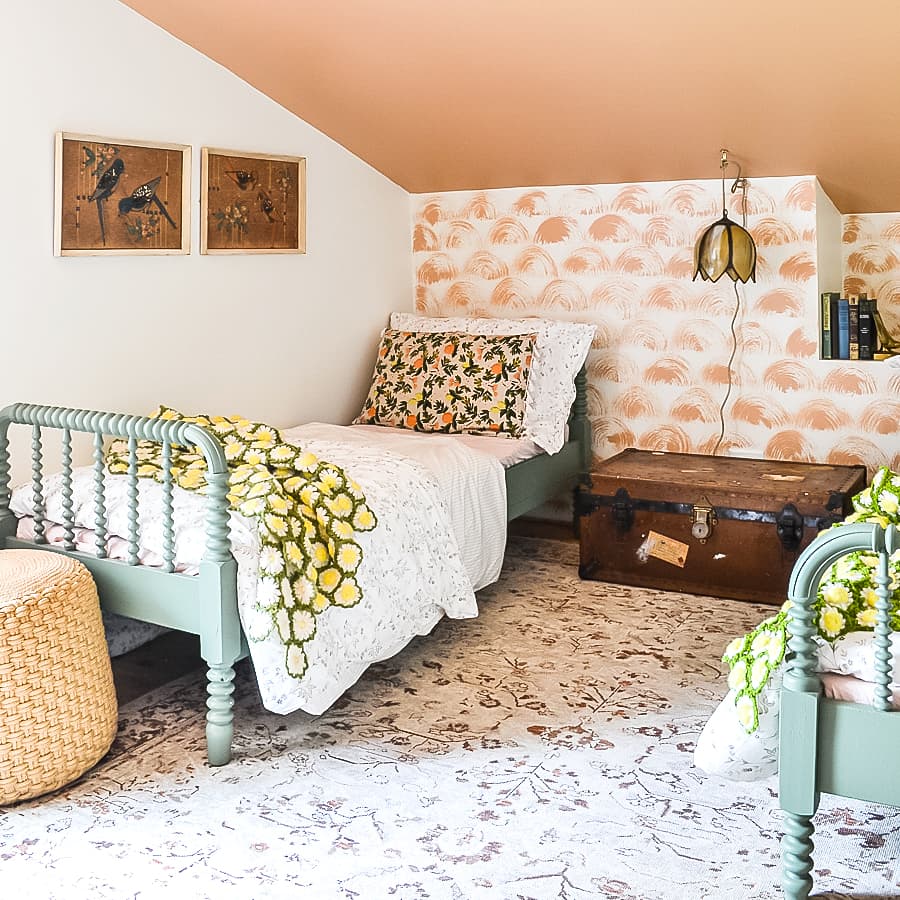
The first step is to use painter’s tape to tape off any adjoining walls, ceiling, baseboard, or casing you do not want to accidentally get paint on. Because I painted our ceiling the same color as the pattern on the wall, I only needed to tape off the adjoining walls (and later the outlet cover as well).
2. Use minimal amount of paint on brush
For this technique, and most patterned walls or stenciling, you’ll want very little paint on your brush. I usually put a little bit of paint in a dish (or in this case, on the top of a plastic bin), dip my brush in slightly, and then dab off excess on a clean part of the lid or on a rag.
3. Paint the rainbow arches
To make each arch, I found where I wanted the center of the arch to land, and then rotated the paintbrush to the left (not yet painting on the wall) as the starting point.
Then, I painted the arch moving from left to right. Most arches only needed one pass of the brush, but if it was too light, I just went over it a second time.
When painting subsequent rows, I made a half arch for the first one, and then centered each new arch under the point where the two arches above it met. Once that center point was found, I rotated my brush (not putting paint on the wall yet), and then used this as the start of my arch that I painted from left to right.
The video in this post shows this a little bit more clearly than I’m able to explain in words.
After getting the pattern motion down, it’s a super fast process to work across the wall in rows.
I actually had no idea how this was going to turn out when I started. I tried a little on a scrap piece of cardboard, but to see it finished on an entire wall gives it a different look. Considering it was free (since I used the same color as the ceiling – Behr Nairobi Dusk) and it didn’t take much time at all, I think it was totally worth it.
Other Projects You Might Enjoy
Post by Jenny Leads
Jenny is the voice behind Refresh Living. She has a passion for helping people to create a home they love without spending a lot of money.