
DIY Snow Covered Christmas Decor
It’s the first Tuesday of the month, and time for another Create with Me Challenge! This month, the winning item was pine cones, which, considering the season, seemed like the perfect choice for an easy holiday decorations. I had a bag of fake snow leftover from my DIY snow globes from old glass jars, so I decided to put it to good use as part of this project.

Basically, all I needed was some pine cones we collected from the backyard and the park, glue, fake snow, and a little bit of white glitter.
I poured the glue on a plate and just rolled the edges of each pine cone in the glue.
Then, I sprinkled fake snow on top, and added a bit of glitter.
The glue only settles on the outside parts, so it looks just as would if the pine cones were sitting outside in a light snowfall.
Since I had all the supplies out, I decided to try to use them for another quick decor project. I pulled some jute twine and cotton string from the basement, along with a couple of water balloons.
After blowing up the balloons, I dipped the string in the glue, and then used my thumb and pointer finger to squeeze off some of the excess glue before wrapping it around the balloon.
I made sure to wrap it in a random way and cover up any huge gaps with the string. While it was still wet, I sprinkled a little fake snow and a little glitter on them, and then set them out to dry.
Messy? Yes. Easy? Definitely. Cheap? You betcha! In fact, since I had everything laying around my house, it was free in my book.
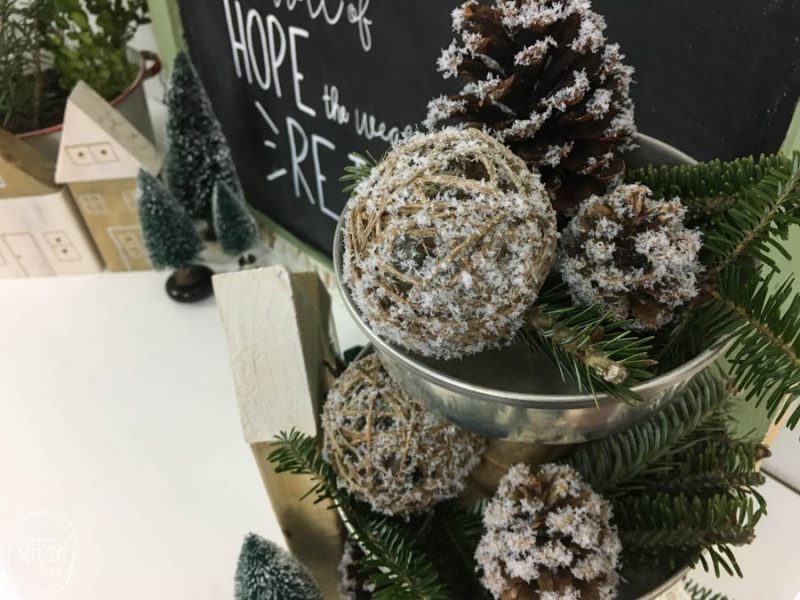
I added some of the cuttings from our Christmas tree to this tiered stand I made from old pie plates and a spindle and I called this pine cone project (+ a bonus rustic string ball project!) a success.
I think these twine balls would also look great as ornaments on a rustic Christmas tree.
These were two easy DIY projects that can stay out well past Christmas!
Take a look at these other holiday projects inspired by pine cones.
Snow Tipped Pinecone Wreath- Little Bits of Home
Pinecone Kissing Ball- Our Crafty Mom
Snow Covered Christmas Decor- Refresh Living
Dipped Pinecone Gift Wrap Embellishment- Making Joy and Pretty Things
Post by Jenny Leads
Jenny is the voice behind Refresh Living. She has a passion for helping people to create a home they love without spending a lot of money.
Love this, Jenny! So adorable and perfect for after Christmas as well!
This is so great Jenny & I always wanted to try the balloon/string idea. The pinecones are great because you can leave them up all winter too!
These look gorgeous! I love the fake snow you used! It looks real!
Awesome! I love the jute balls as well! You can use those throughout the whole winter as well.
I was hoping you would tell us how you made/or where you got the stand
Thanks for the question. I actually just took some old baking tins that I found at a thrift store and then cut down an old spindle. I think for this one I just used hot glue to hold it all together, and it’s holding up really well!
What a great idea and so quick and easy! Thanks so much for sharing this with us at the DI & DI Link Party. We loved having you.
Merry Christmas
Such fun decorations! Thanks for sharing with us at Funtastic Friday Blog Hop!