
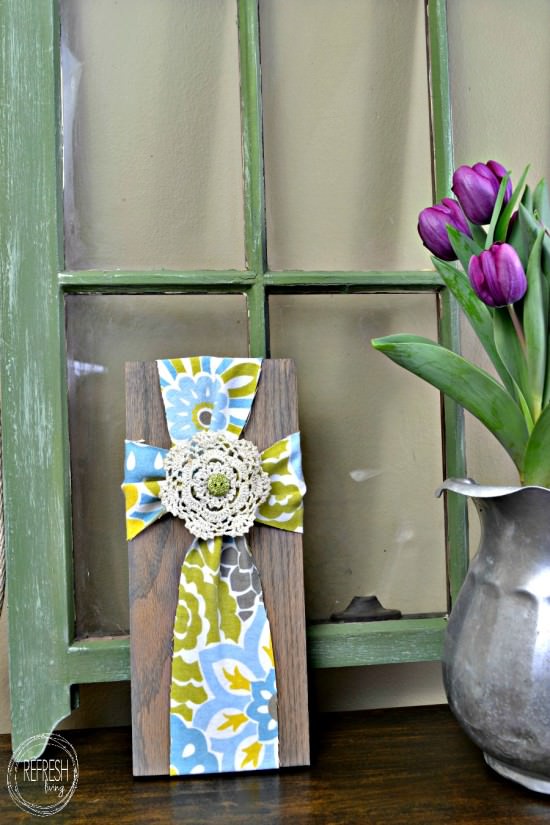
Easy DIY Easter Decoration – Fabric Cross
Make a DIY cross decoration using a scrap of fabric and a leftover piece of wood. This project is so easy and it’s perfect for Easter or to hang in your home year round.
I’ve admitted in the past that I’m not great, or very motivated, to decorate my home for most holidays. A lot of holiday decorations are fairly expensive, and I feel as if lately they are looking exactly the opposite – a little cheap. I’ve been trying to slowly add items to my decorations for every holiday, without spending much money.
I actually made this DIY Easter decoration with stuff I already had around the house, but if you needed to buy the supplies, it would still cost less than $10! Plus, it took less than five minutes to make which is a win-win in my book.
Making a DIY wooden cross is also very easy (and inexpensive). I added a little flower vase to mine and it hangs in our hallway all year.
Supplies to Make Fabric Cross
- 1″ x 6″ piece of wood, about 13″ long
- wood stain (optional)
- strip of fabric – 44″ long
- doily
- button
- thread
- staple gun (or hot glue)

How to Make a Fabric Cross on Wood
Cut a 6″ board to be about 13″ in length. You can also use different widths of boards and different heights to change up the ratio of the fabric cross. Stain or paint the board based on your preference.
Cut the piece of fabric into two pieces (one piece 15″ and the other 29″ long). Then, take the pieces of fabric and lay them pattern side facing down on a table. Cross the pieces with a quarter turn and lay the piece of wood on top. Staple (or hot glue) the four ends to the back of the piece of wood to hold it in place.
Here’s a quick video tutorial of the process that I posted on my YouTube channel.
The sides of the fabric will fray, but I really like the look – I think it adds an imperfect rustic touch.
If you can’t get your hands on a small doily, you could add a larger button, create a fabric flower, or just leave the cross as is with just the crossed flip in the front.
I’m so happy with how this cross turned out, and how cheap and easy it was to make. Think about all of the different fabrics there are to choose from to let you personalize your own!
Post by Jenny Leads
Jenny is the voice behind Refresh Living. She has a passion for helping people to create a home they love without spending a lot of money.
Thank you so much for sharing your tutorial with us at Talk of the Town. I LOVE this idea!
Great cross. Love its simplicity. Visiting from Creativity Unleashed party.
Thanks, Victoria! It really was an awesome project because it was so simple.
What a pretty cross. It’s so lovely and yet simple. Great idea! – Jenny
The cross is beautiful, I also love the window, you have used in the display. Can you tell me the color and paint you used?
Hi Judy – the paint I used on the window was Miss Mustard Seed Milk Paint, and I’m pretty sure I mixed colors to get that color. If I remember correctly, I mixed Luckett’s Green and a little bit of Boxwood. Then, I dry brushed some Luckett’s Green on top. I hope that helps (of course, it had to be a custom mixed color, right?!)
What a great way to make a beautiful cross. Thanks so much for sharing.
Thank you!