
DIY Nativity Scene with Antique Mirror Finish
Easily update a second-hand ceramic nativity set with this DIY antique mirrored glass tutorial.
By using black spray paint, vinegar, water, and mirror glass spray paint, you can give basically any home decor item a new antique glass finish.
I used this DIY mercury glass technique on a thrifted nativity set to give it a new look for the holiday season.
I love “window shopping” around the holidays. Basically, I walk through the Christmas section of any store I visit and do online browsing at the expensive stores I can’t afford.
Although I love looking, I never actually buy any of these Christmas decor items. Instead, I stash away little ideas in my head of how I can replicate a look I love for a lot less. I saw these antique glass Christmas trees at Pottery Barn and these mercury glass trees at Ballard Designs (at the hefty price of $40-$50, per tree!) and I knew I could easily replicate the look.
I’m a huge fan of decorating for holidays, including Christmas, without buying new. There are so many ways to upcycle old items to be used for recycled Christmas decor!
I’ve also made a modern, DIY Christmas village from thrift store finds, made free snowflake ornaments from toilet paper rolls, and reused old sweaters to make sweater Christmas trees. You’ll find these projects and more at the end of this post.
How to Make any Object Look Like an Antique Mirror

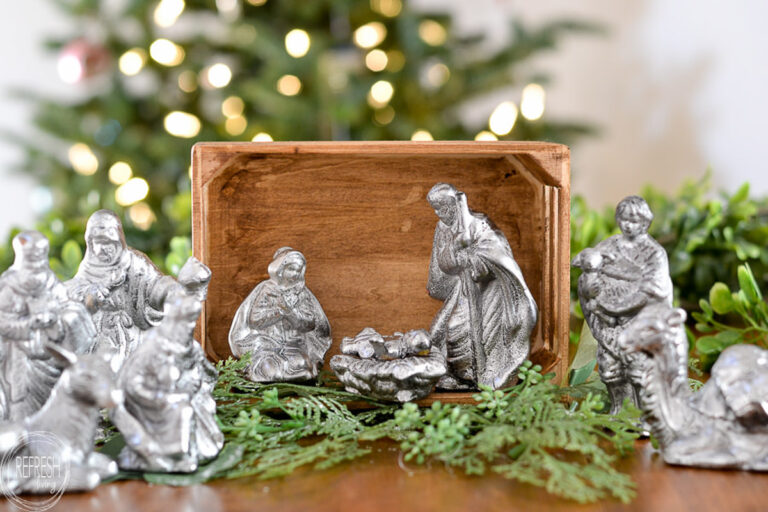
Normally, this DIY antique glass technique is used on clear glass objects. However, this nativity scene that I picked up from an estate sale for $5 was obviously not clear.
I decided to give all of the pieces a consistent base color of black before using the mercury glass technique and it worked beautifully! I now have an updated DIY nativity scene for less than $10.
Here are the steps to give any object an antique mirror or mercury glass finish:
- Clean all surfaces and then wipe down everything with rubbing alcohol and let dry completely.
- Paint the entire surface black (any sheen of paint is fine for this step).
- Optional: Give a light coat of gold or brass metallic spray paint, making sure that some of the black is still showing.
- Mix water and vinegar at a ratio of 1 part vinegar to 1 part water and add to a spray bottle set on mist (not stream).
- Lightly spritz the surface of the object with the vinegar/water mixture.
- Then, immediately spray a coat of mirror effect paint all over the object.
- While the paint is still wet, lightly dab at the surface with a paper towel to remove some of the paint (in the places where the vinegar/water hit).
- Optional: Spray a light coat of gold or brass metallic spray paint on the surface to give the final coat a little more dimension in color.
I know these aren’t the lighted Christmas trees I linked to at the beginning of this post, but I still wonder what a mercury glass nativity set would sell for at a store like Pottery Barn. I’m guessing more than $5 and a can of spray paint that I already had sitting around the house!
As always, let me know if you use this technique on any of your projects. I’d love to hear your experience and what you decided to use it on!
If you’re a Christmas decorations window shopper like me, I think you’ll like some of these other upcycled and DIY holiday projects:
Post by Jenny Leads
Jenny is the voice behind Refresh Living. She has a passion for helping people to create a home they love without spending a lot of money.
This is gorgeous, and the perfect solution for a keepsake that doesn’t really fit your decor! Are you suggesting we paint the figurines black before following steps 1 through 3? I can’t wait to try this, but I’m unclear on where the black paint comes in. Does it matter if it’s matte or shiny? Thanks so much for the clarification!
Hello! Yes, you’ve got it – I painted the figurines first in black so it looked more like a mirror effect. Matte vs. gloss shouldn’t really matter. I think I used a flat, but I think whatever you had on hand will work just fine. I will update the post with that detail, as it’s not really clear. Thanks for reaching out!