
How to Install Decorative Wood Fretwork Panels
Installing wooden fretwork panels are the perfect way to bring unique detail and interest to any room.
The creative uses of wood fretwork are endless! They can be installed on an entire accent wall, on a section of the wall as a feature element, or up on the ceiling. There are many different patterns and sizes which all create varying looks when used throughout a space.
Plus, you can choose between different wood species and then stain them to a color of your choice. Or, fretwork panels are also available in paint grade material for easy painting.
I used these panels to create ceiling fretwork in my DIY bathroom remodel, but the installation process is the same for installing on walls as well.
In this post, I’ll share the steps on how to add this decorative DIY element to your own home!
This post contains affiliate links. Please feel free to read my full disclosure policy.
What is Wood Fretwork?
Fretwork is a type of design that interconnects intricate details in a geometric pattern. Wood Fretwork panels are made out of a variety of different species of wood or even PVC. Most wood panels are laser cut from 1/4″ or 3/8″ thick plywood with stainable thin wood veneer on both sides.
Decorative fretwork panels can be installed in both large and small areas to add a dramatic feature to any project. I’ve seen them used above mantels, on feature walls and in smaller art pieces as well.
After seeing how cool they look in a room, I decided to try using them on my ceiling. If you’re planning to update a ceiling in your room in a unique way, this post combines 24 other creative ways to design a ceiling.
Follow the simple installation tutorial below to add these wood panels to a wall or ceiling in your home!
Materials Needed
- Wood fretwork panels (I used large Hampton panels in Red Oak, but Birch is a more budget friendly wood grade option)
- painter’s tape
- 2 inch brad nails and nail gun
- circular saw, rotary tool with wood blade, jigsaw or table saw
- Loctite Construction Adhesive
Steps to Install Fretwork Panels
Installing wooden fretwork in your home is a very “DIYable” project that can easily be completed in a few steps.
1. Plan layout of the panels
First, measure the width and length of your wall or ceiling. Then, measure the length and width of your fretwork panels (most will have the same width and length because the pattern is repeatable). Use this measurement to plan out the best layout for your space.
You don’t necessarily need to center any of the panels (because the pattern repeats). Instead, try to plan out the best placement for your end cuts to fall. (For example, if I can plan for the cuts to fall halfway through some of the panels, I can reuse the other half somewhere else.)
Because I am such a visual person, I actually taped off the dimensions of my bathroom ceiling on my living room floor. Then, I configured the panels to determine the best layout. I measured the placement of one of the panels near the center of the design from the edges of the panel to the walls.
Then, I went back into my bathroom and measured the distances from each wall to the placement of that panel and marked it with some pencil marks.

2. Stain, seal or paint the panels
Most of the time, it’s best to finish the fretwork pieces before installing them. You can stain the wood fretwork to add color and/or seal them for protection. Do this before installing them to avoid getting stain or sealer on your walls or ceiling.
The only time you wouldn’t need to finish the panels first would be if you are painting the panels the same color as the wall or ceiling. In this case, you can you a sprayer (or brush, but it will take a lot longer) after the panels are attached.
In my bathroom, I used four coats of General Finishes Arm-R-Seal on the front, back and sides of every panel. This step was, by far, the most time consuming step in the project. However, I wanted to make sure to protect every part of the panel from the moisture exposure of a bathroom with a shower.
(Arm-R-Seal is my favorite water-resistant sealer that doesn’t add much sheen. I use it on tabletops because it penetrates the pores of the wood creating a very resistant finish without the added shine that other water repelling sealers would create.)
Update: This wood ceiling in our bathroom has been installed for a year and half. Being that this is our main bathroom, it’s used for at least 4 showers a day. So far, we’ve had absolutely no moisture issues on the wood whatsoever.
3. Find and mark studs or joists
Use a stud finder to locate the studs in the wall or the joists in the ceiling. Mark the studs with painter’s tape in a few sections along the length of the stud.
I prefer to use painter’s tape as opposed to a chalk line or pencil mark because fretwork panels do not cover the entire ceiling. Therefore, some of those lines will still be showing after install and they’ll need to be cleaned up.
Removing little pieces of painter’s tape is WAY easier!
4. Install wood fretwork on ceiling or walls
Install one of the panels near the center of the wall or ceiling first. Just make sure to install it level with each of the walls (if installing on the ceiling) or level with the floors and walls (if installing on the wall).
The reason I used this method instead of installing straight off one wall is because my ceilings/walls are just not straight. I actually tried to do it this way and ran into a problem.
After installing a couple of panels, they were not lining up flush with each other and the wall. This resulted in gaps between some of the panels that kept getting worse (because I was installing of an un-square wall).
Once I installed one of the middle panels first and then worked my way out, my panels installed much cleaner and more evenly. Then, I measured my cuts when I got to the last piece to install next against the wall. Lesson learned – at least for this particular room!
Note: If you’re installing fretwork panels in a small area as a feature wall, you can just plan the panels into a square or rectangular shape. All your cuts will be even and equal because you are creating a perfect shape (unlike some walls).
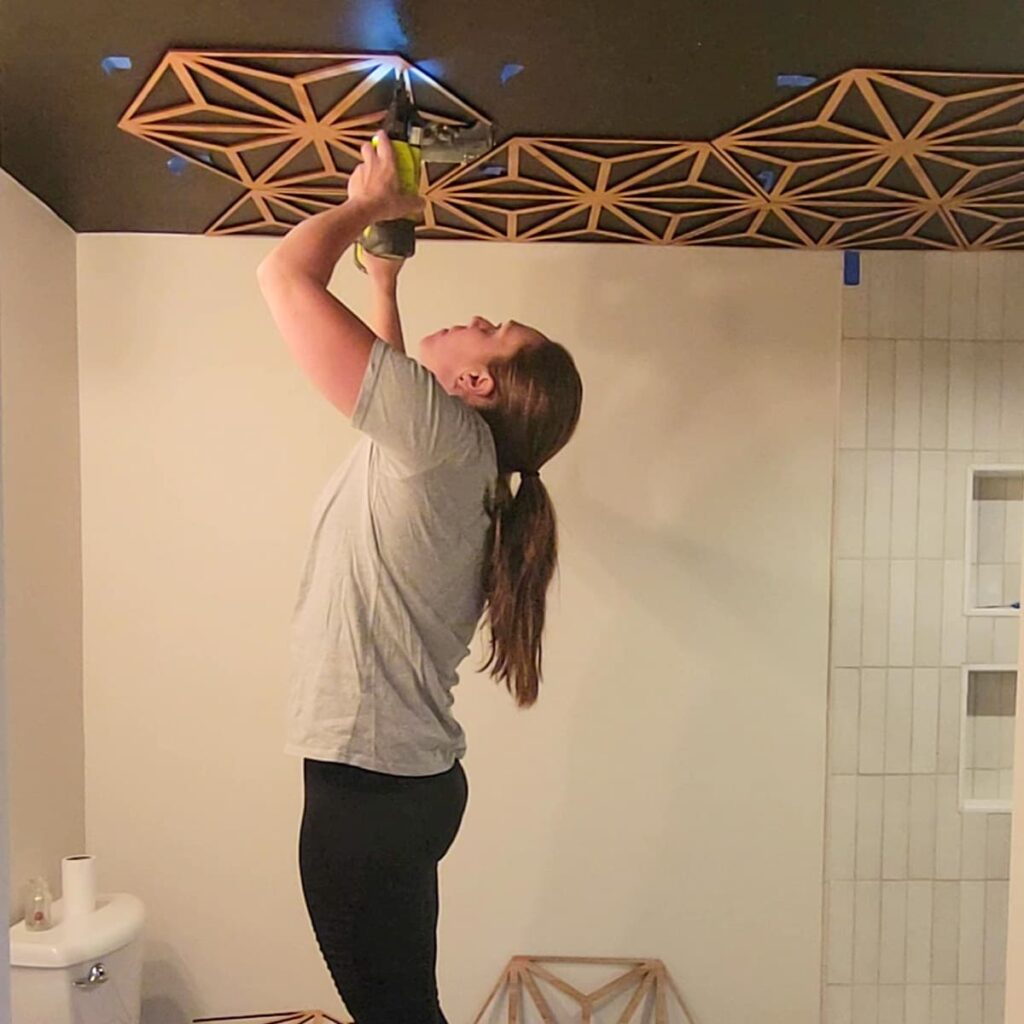
Use a brad nailer with 2 inch nails to attach the panels to the ceiling into the marked studs or joists.
There will be some places where the panels will only fall into one stud. In these areas, use a dab of Loctite adhesive on the corners that don’t hit a stud. You can use painter’s tape to hold the panel in place until the adhesive sets.
I tried to use this adhesive as little as possible to avoid trouble removing the panels later. Just try to make sure you put a couple of nails in all the places that fall on studs to keep the panel secure.
5. Make cuts as needed
The panels will need to be cut at the end of the wall or ceiling, as well as around and outlets, light fixtures or fans.
For long straight cuts (like along the wall), I found my table saw to work the best. You could also clamp the wood to a piece of scrap plywood or foam board and use a circular saw to make straight cuts.
For smaller cuts (around the vent fan and light hole), I used my small rotary tool with cutting blade attached. Be sure to clamp the wood to the surface right by the place you need to cut so the panel doesn’t move around.
If you like the idea of using wood to add interest to a room, this post shows how I used beadboard from an antique milk barn on the ceiling in a different bathroom, and how to install faux shiplap paneling on the wall.
If you end up using these fretwork panels on your next DIY project, let me know in the comments or send me a photo on social media or through email! I’d love to see how it can be used in other spaces.
Post by Jenny Leads
Jenny is the voice behind Refresh Living. She has a passion for helping people to create a home they love without spending a lot of money.
I love the idea and I’m thinking about something similar in my bedroom. But your posts don’t include pictures of the finished room. Any chance you could share a pic of the finished project/room?
Here’s the room I used them in – my bathroom
I absolutely love all your projects! You have definitely given me some new ideas. I am very motivated now to start a new project. Thank you for sharing.