
DIY Book Ledges – Easy and Inexpensive Organization
These DIY book ledges are cheap and easy to build, and provide excellent storage for books. They can even be installed behind a door!
Our house is bursting at the seams – with books. I agree, this is a fabulous problem to have and a preferable item to be “bursting with”. I can certainly think of A LOT of other things I wouldn’t want taking over my house.
It’s an awesome problem to have, but none the less, still a problem.
I’ve built a couple wall-mounted bookshelves to use in my kids’ rooms, but our nursery was still in desperate need of a place for those books to rest peacefully when not being read.
Now, I actually have an IKEA Kallax bench that I could turn back up to use as a bookshelf, but the problem is that this wall is behind two different doors. If I put any sort of bookshelf here, the doors won’t open up correctly.

In order to make the use of this awkward space behind two doors, I decided to build some book ledges that would extend out only a few inches from the wall.
The best part of this project was certainly how inexpensive it was. I spent $15 on wood, and then used some stain, screws, and nails I already had around the house.
I certainly can’t complain about how difficult it was, either. Honestly, the most time consuming part was staining all the pieces of wood! It’s definitely a great beginner DIY building project.
This post was originally published in 2017 and has been updated in 2024 with a more detailed tutorial.
Wood Needed to Make a Book Ledge
I used 1 x 4s, 1 x 3s, and 1 x 2s for my ledges. I looked at a couple of different examples online, and I didn’t like the proportions on many that I saw. These wood sizes created the perfect sized shelves for what I was looking for.
Here’s a little hardware store tip. To save quite a bit more money, you can purchase furring strips instead of dimensional lumber for the 1 x 2s and 1 x 3s. It usually takes a little digging in the piles to find straight pieces, but I always am able to find great pieces of wood for under $1. You will need to buy dimensional lumber for the back piece, though.
When purchasing this type of wood, the most inexpensive pieces (called standard boards) also have the most knots. I like to call this character, and usually buy those standard boards. Again, just dig through the pile to find straight pieces without massive knots or holes. If you want wood without knots, you’ll need to grab select lumber or higher.
After cutting the pieces down to the length of your bookshelf, you can stain or paint them now, or wait until they are assembled to do so. In my case I stained all the board first using Varthane Golden Oak colored stain.
Attach Boards Together to Make the Book Ledge
To attach the boards together, you can use screws drilled through the back and recessed (so no one will see them) or you can drill pocket holes on the bottom to attach the back. To secure the front of the book shelf, you can use finish nails.
When attaching all the board together, you’ll want to make sure to use wood glue before screwing or nailing anything together.
In this tutorial, you’ll see in the images that I used the pocket hole method with my Kreg Jig, but I’ve also built picture frame ledges by screwing through the back which you can see in this project where I used the shelf to create the look of a headboard.
First, add wood glue to the bottom inch of the 1×4 board. Attach the 1×3 piece to it using pocket holes and screws or screws drilled through the back of the 1×4.
Then, apply wood to the front of the 1×3 board and attach the 1×2 board across the front using pin nails.
How to Easily Install Book Ledges
To install the ledges, use a stud finder to find and mark the studs with painter’s tape.
Hold up each shelf at the place you would like to install it on the wall. Then, place a piece of painter’s tape on the shelf at the same place as where the painter’s tape is on the wall.
Drill a pilot hole into the back board of the ledges at the places marked with tape. Drilling pilot holes ensures the wood doesn’t split when screwed into.
To install the ledges, screw through the pilot hole in each board and then into the wall and stud. You can use a small level to help with level install here, or just eyeball it!
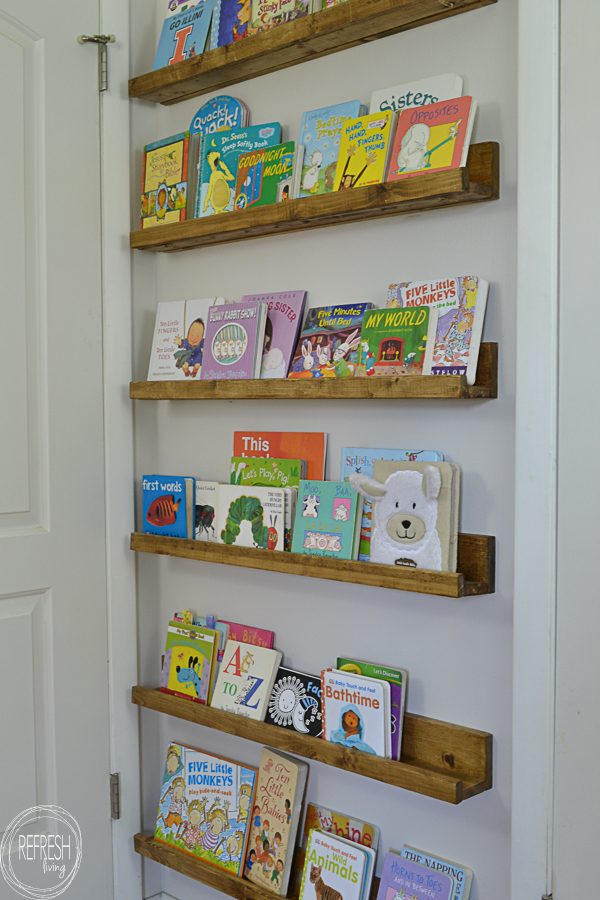
The screws are visible when none of the books are on the shelves, but they’re never seen when items are actually on the shelves.
I’m so pleased with how they turned out! They fit all of our little board books perfectly and take up virtually no room in a space that was practically unusable anyway.
I think everyone should install book ledges behind their doors, don’t you?
I have plans to make large picture frame shelves for my living room using this same method. I can’t get over how cheap it is to build these wood shelf ledges and the difference they make to a blank wall!
Post by Jenny Leads
Jenny is the voice behind Refresh Living. She has a passion for helping people to create a home they love without spending a lot of money.
I’ve just found your blog and I’d like to say that I’m in love with it!
Your posts, style of writing and photos are amazing! You do a great job!
Great, thanks!
Super cute! I love ledges like these for books (and artwork).
Thanks Melissa. I love the idea of putting artwork on these types of shelves too!
Your book ledges look great! Thanks for posting this tutorial- I’ve been wanting to make some book ledges for some time but wasn’t sure how I wanted to do it.
I’m happy to help! This type is so easy to make, and they are also super sturdy. The kids climb up them to grab books when I’m not looking… :/
These look awesome!! Great job!!
Thanks Rebecca!
These look great and it’s making me think something like this would look perfect in our living room! Thank you for sharing this with us at Funtastic Friday!
Thanks Angie! You’re right, I think they could definitely be used in a living room, with books or pictures.