
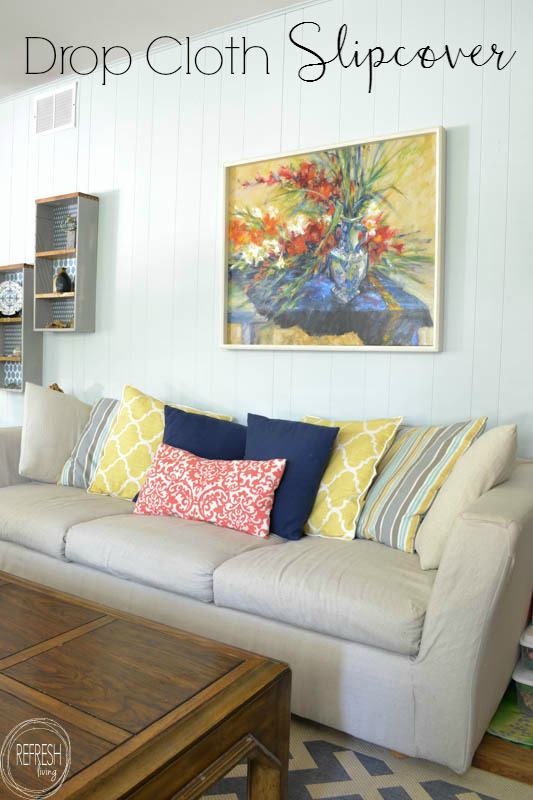
DIY Drop Cloth Slipcover
Okay, so I admit it. This isn’t a true slipcover. It’s more of a hybrid between a slipcover and a new upholstery job. When I did this project, I had actually only sewn two other things in my life: a pillow in 7th grade Home Economics and Christmas stockings this past year (following a pattern, of course). Needless to say, I am still new to this sewing thing, so if you’re hesitant to complete a project like this, give yourself a little credit and try it out.

You can see that this couch had been well loved. I’ve always remembered it to be this dirty beige color, but I’m assuming it was once a much lighter shade in its prime. I actually was digging through old pictures and I found this couch in the background. The picture was from 1980, so this beauty has been around for awhile.
I decided to slipcover it for a couple of reasons. First, I’m cheap thrifty and didn’t have it anywhere near in the budget to buy a new couch, let alone a sleeper sofa. Which brings me to my second reason. Because this is a sleeper sofa, it’s important to have up at a lake house where we often jam more people than there are beds. Plus, it made it far easier to slipcover because it didn’t have back pillows attached to it. All it had were extremely flat throw pillows.
I have another confession. I really had no idea what I was doing when I did this project. For this reason, I’m not going to structure this post as a full tutorial, because you probably shouldn’t be listening to me about how to do this. I will, however, share with you a few tricks and tips I learned. Take them or leave them. Or silently think to yourself, “Duh, I knew that”.
First, I washed and bleached the drop cloth using Miss Mustard Seed’s method. It seemed to work very well and lightened it up ever so slightly.
I draped the drop cloth over sections of the sofa, starting with the two arms, and trimmed away the excess. I stuck pins through the fabric and into the couch to hold the fabric in place. (They sell upholstery pins for this, but I just used my regular ball pins.)
I gathered the fabric and pinned along the edge of the arm, trying to pin as close to the seam of the original couch as possible. Use a piece of marking chalk (or a crayon, colored pencil, whatever you’ve got) to mark the seam line you will sew. I didn’t do this at first, and I found it difficult to know exactly where to sew, since the pins weren’t always in a straight line. I recommend marking your fabric, and remember, this will actually be on the inside of the slipcover, so you don’t need to worry about marking it up.
I sewed my two arm pieces, and then worked to add the back panel piece and the front panel piece, stopping to check the fit after each piece I added. You’ll notice my arm pieces don’t match perfectly with the lines of the couch, but for a first-timer, I’m pretty proud of myself!
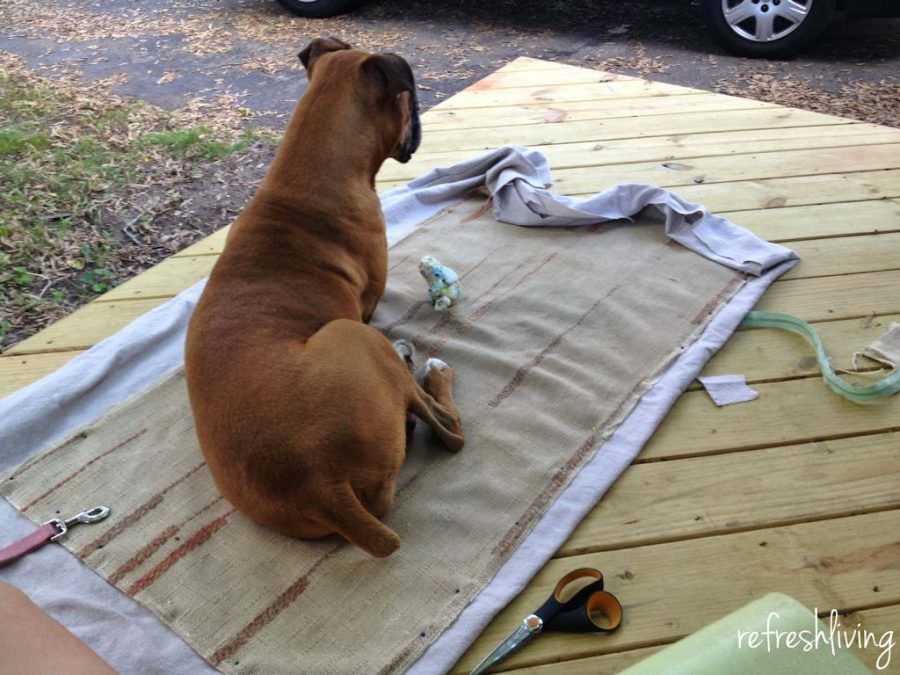
Although I saved time with my cutting, this didn’t speed up the process:
I reused the zippers from the old cushions and sewed the pieces together. The only way I had any idea what I was doing was by looking at how another cushion was sewed together. So if you’re a rookie like me, be sure you don’t rip apart all the cushions at once, save one as your reference until you get two under your belt!
I sewed together a few throw pillows in some fun fabrics. I love how much they brighten up the room.
All in all, it cost $70 to refinish the whole couch. The pillow supplies were actually the big ticket items at $30 for all the fabric and $20 for the fiber filling. The drop cloths were a steal at Home Depot – $10 for a pack of two. I needed a total of 4 drop cloths (6 ft. x 9 ft. each). I’ll take $70 over $700+ for a new couch any day!
Update: The slipcover is still holding up beautifully! I’ve since figured out how to make much nicer pillow covers, ones that can be washed more easily.
Post by Jenny Leads
Jenny is the voice behind Refresh Living. She has a passion for helping people to create a home they love without spending a lot of money.
Hi, Jenny
This is a great idea and you did an amazing job.You have some great sewing skills. Your sofa looks great and that fabric is a great idea. Stopped by from Get your DIY link party. Enjoyed looking around your awesome blog. New follower. Have a great week.
Thank you so much! I’m glad you enjoyed looking around.
You’ve got to be kidding me. All you’d sewn were 2 projects before, one being in school?! You are awesome and you sound so much like me – I could never post a tutorial on one of my sewing projects since I just wing it. Loved this post – it looks so awesome and I wish I was brave enough to do this!! 🙂 Pinned to the Trash 2 Treasure highlights board.
Thanks! After tackling this project back in the summer, I realized I could probably sew a lot more than I originally thought, and have since sewn quite a bit! I guess I just needed to try it out and gain some confidence.
Wow that turned out great! Good job….
Hi! Thanks so much for linking up! you’ve been featured at HandmadeintheHeartland.com tonight 🙂
What a great way to update your sofa, budget friendly too! Thanks for sharing at our Get Your DIY party! October’s theme is Falling for Fall. I hope you’ll come back on the 5th and share with us again! XO
Here’s another thrifty way to get stuffing for throw pillows. Go to Walmart or wherever you can the least expensive loose, poly-filled bed pillows. Open them up and use the stuffing as you would any packaged filling 🙂 I get the ones at Walmart that are about $3 per pillow. Waaaay less expensive than buying poly filling that’s labeled specifically for filling 🙂
Thank you so much for the tip. I’m sure it’s so much cheaper – thank you, thank you!
hmmm…ill keep that in mind!
Where did you buy the drop cloth ?
I bought a pack of two 9′ x 13′ drop clothes at Home Depot. I know they have them at most hardware stores, though.
What weight drop cloth did you use?
Wow this is so awesome! I’ve been wrestling (in my mind) about whether to paint or recover my peeling faux leather sofa & loveseat. The peeling process is taking forever at say over a year now in between cooking, cleaning and babysitting. Your idea gives me (beginner sewer) much hope. I last sewed a pants in 9th grade and I graduated hs in ’84! Lol
Hi Lori! Yes, I think because drop cloth fabric is so inexpensive, it made me feel okay to take the plunge and give it a try. It’s been 3 years and it’s still holding up great! Good luck on your project!
Great slipcover. Love your pillows too. Hope to see you link up with us at Family Joy Blog Link Up Party this week. Check us out http://ow.ly/IEfD305FfQn
Looks fabulous and love the color, perfect with the pillows! thanks for sharing on craft schooling sunday!
You did a great job! Very nice. I have been wanting to do this myself but keep putting it off. This might just be the inspiration I need. Thanks for sharing at the Family Joy Blog Link Party this week!
Very well done, what a huge difference you cover made. Your couch will be stylish for awhile more now.
I smiled when I saw you dog sitting on your work. I have a Great Pyrenees that I nick named Quality Assurance as he is always at my side when I am doing projects.
Thank you for sharing.
For your first slipcover you did a beautiful job. Thank you so much for sharing at Snickerdoodle.
For your first slipcover you did a beautiful job. Thank you so much for sharing at Snickerdoodle.
You did a great job! I’ve made a couple chair slipcovers before and they certainly are not easy. Total thrifty transformation! Visiting from Inspiration Galore party.
Very impressed with your sofa makeover. It looks awesome. I will be featuring this tonight at my Fall into Fall party that opens at 8pm EST. Please stop by and pick up an I’ve Been Featured button. Thanks. http://diybydesign.blogspot.com
Oh my goodness. What a great job. I have the same style sofa and wanted to make slip covers for it but don’t have a lot of money to do so esp since it’s about 8ft Long lol. I am going to try this. You have inspired me to do so. Looks great!! Lorinda
does this come off for washing and using with a sleeper? How did you go about attaching the arms to the body, and finishing the bottom? Very inspired.
Hi Cheri. Yes, you’re right in that it doesn’t come off easily for washing. The seat covers come off and we’ve washed those, but the part around the arms and base is stapled to it. The sleeper is still easily accessible because I was able to wrap the cover around the frame without interfering with the sleeper. Every couch would be different, and I think this type of couch made it pretty easy to work with. Thank goodness!
Hi Jenny! I was just wondering if you had sewed all this or used a machine??
And if hand sewed what kind of stitch did you use?
Thank You 🙂
I did use a machine. I actually don’t even know how to hand sew, except a really messy stitch. 😉
Thanks for sharing this Jenny! We just bought a used couch from a local thrift store. After a professional upholstery cleaning to get it sanitized, we decided to follow your slipcover tips to make it look new again. You are the best!
Hello! I read this post a few years ago and I have yet to attempt to recover my Pottery Barn couch. I have all of the supplies to make a new slipcover but I’m still waiting to pull the trigger ha ha. Do you have any updated photos of this couch by chance?
Hi Laura. I’m sorry for the delay in responding to this. I actually just tried to update that post a couple of months ago and realized how few photos I had taken of the process. It was one of my very early posts! If you start laying out the fabric, pinning it, trimming the excess, and then sewing that section, you’ll be able to work along the whole couch and it sort of just comes together. Each time you sew a new panel to the slipcover, put it back on the couch to test the fit, and then pin the next section to sew. Sorry I can’t be of much more help than that!