
How to Make a Coat Rack from Decorative Knobs
You can use decorative dresser knobs to make towel racks or coat racks that are unique and pretty. By adding these knobs to reclaimed pieces of wood, you can create a one of a kind set of hanging hooks in less than 30 minutes.
If you’ve ever ventured down the aisles of Hobby Lobby, you’ve seen the huge selection of decorative knobs and pulls that they have. Whenever I’m in the store, I always stroll down that aisle, usually just looking at the different designs, waiting for inspiration to strike. Sometimes, I’ve found knobs that I love, and then designed a whole piece of furniture around those knobs!

We all know that decorative knobs can be used as drawer and cabinet pulls, but there are a ton of other great uses for them as well.
I took some knobs (although they were vintage ones, but new ones could be used in the same way) and added them to the tops of old glass jars. They now store bathroom supplies in our house, but you could use them for so many other purposes, too.
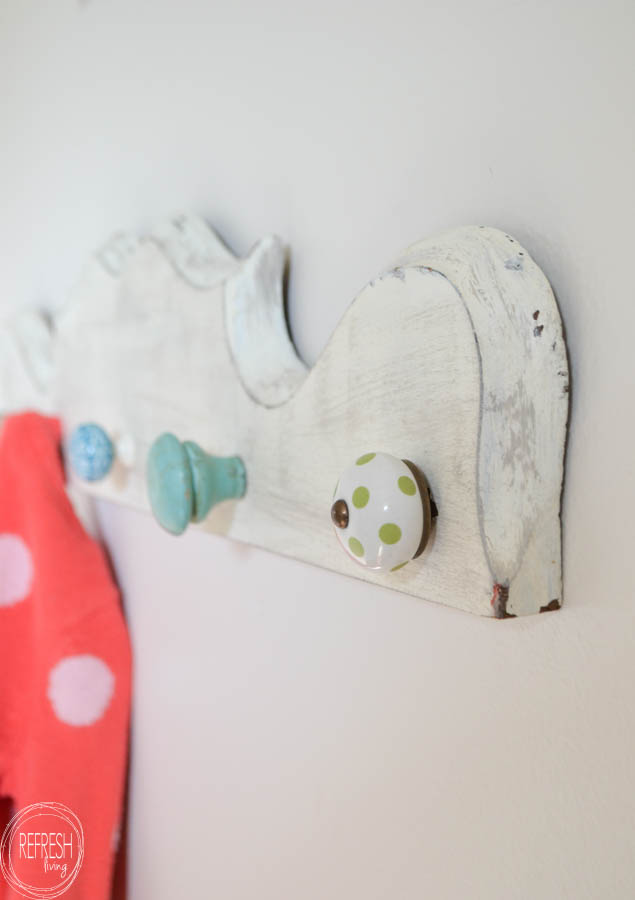
I also love to use these pretty knobs to make racks for hanging items like coats, towels, and jewelry. It took me awhile to figure out how to make them work (without a massive nut or screw sticking out the back), but I’ve since perfected the process and here to share it with you.
This post contains affiliate links. Read my full disclosure policy here.
Supplies to Make Your Own Coat Rack with Knobs
- Piece of wood, new or reclaimed
- Decorative knobs (Hobby Lobby has a huge selection, so does D. Lawless Hardware)
- Bolt cutters
- 1/16″ drill bit
- 5/32″ or 3/16″ drill bit (5/32″ is large enough for most knobs, 3/16″ is definitely large enough)
- 1/2″ spade bit OR 1/2″ forstner bit OR 1/2″ drill bit
- Keyhole or D-ring brackets, for hanging
The first step would be to prepare your wood. Cut it down to the size you would like to use, paint it or stain it or seal it or leave it as is. For my piece, I used the top of an antique washstand that was left over from our bathroom vanity project.
I painted it dark blue, added some wax to the edges, and then painted it gray. After the paint dried, I lightly sanded the piece to reveal a few places of the blue. Then, I did the same steps and covered the gray with white paint, let it dry, and sanded some of it away.
I measured the distance I wanted in between the knobs and marked each one with a small “x”.
How to Attach Knobs to Wood
The next step is to drill the holes in the wood. First, drill a small pilot hole through the wood in the places you’d like to attach the knobs. This hole should be smaller than the width of the bolt on the knob. A 1/16th” bit works well.
Then, use a 1/2″ spade bit, forstner bit, or 1/2″ drill bit to drill a shallow hole on the back of the board in the places where the pilot holes were drilled. Do not drill through the wood, just deep enough for the nut to sit recessed in the wood.
Then, use a drill bit slightly wider than the width of the bolt on the knob and drill through the pilot hole all the way through the wood. A 5/32″ drill bit is usually the appropriate width for most decorative knobs.
I added two keyhole hangers to the back, one on each side, but you could also use d-ring hooks, or even saw tooth hangers.
Before adding the knobs to the wood, you’ll need to cut the screw down so it doesn’t stick out of the back of the wood. Bolt cutters work great for this. You’ll need to use some grip strength, but small bolt cutters will get the job done. You want to cut the screw so that it is flush with the back of the wood when you put it through the hole.
Screw directly into the studs, or use a drywall bracket to attach your screws to the wall, and then hang up your new coat rack!
It’s so fun to pick out your favorite knobs and put them together to make something functional and pretty!
Post by Jenny Leads
Jenny is the voice behind Refresh Living. She has a passion for helping people to create a home they love without spending a lot of money.