
How to Paint Cabinet Doors (10 Tips for a Smooth Finish without a Sprayer)
Can I paint my kitchen cabinets with only a brush and roller and get a smooth finish? Yes, you sure can!
It is entirely possible to get a smooth, beautiful finish without a paint sprayer. This post will walk through everything you need to know about how to paint cabinet doors and kitchen cabinets to get a smooth finish with a paint brush and a roller.
In This post You’ll find:
- 1. Properly prepare your cabinets before painting
- 2. Choose the right kind of primer
- 3. Gather the correct painting supplies
- 4. Choose the best type of paint for cabinets
- 5. Order matters! (brush and then roll cabinet doors)
- 6. Use thin coats of paint
- 7. Leave the paint alone
- 8. Sand properly between coats
- 9. The final coat counts when painting cabinet doors
- 10. No topcoat needed
1. Properly prepare your cabinets before painting
Before painting your kitchen cabinets, I highly recommend to clean and sand them first.
How to clean cabinets before painting

First, it’s essential to properly clean your cabinets and cabinet doors before painting. Kitchens are extremely high use and gather a lot of grease, dust, and grime over the years. A TSP cleaner is the best choice for cleaning cabinets before painting. It comes in a powder form that you mix with water (shown in the image above), or a pre-mixed bottle that you spray on.
When cleaning your cabinets, use a sponge to thoroughly clean the surface with the cleaner. Then, “rinse” off the excess cleaner with a damp towel. Finally, dry the cabinets with a dry towel and allow to fully air dry.
How to sand cabinets before painting
I always lightly sand cabinets before painting. I understand that many people (and some paint manufacturers) claim you don’t need to do so, but I’ve found this step helps the primer to adhere better. For this step, I use 220 grit sandpaper to lightly scuff up the finish. DO NOT try to remove the old finish or paint in this step.
If your old finish is drippy, bumpy, peeling, or flaking, whatever you paint over it will also be drippy, bumpy, peeling or flaking. This would be the only time I suggest using a lower grit sandpaper to remove that old finish with imperfections.
If your previous finish is in horrible shape, you may need to bust out the stripper and completely remove the old finish. [This is definitely quite the project, but not impossible. My post on how to strip wood furniture will give you everything you need to know about stripping furniture (and the same process can be used for cabinets)].
2. Choose the right kind of primer
The type of primer to use on kitchen cabinets depends on the type and condition of your current cabinets. I have a LOT more to say about the best kind of primer for cabinets, so if you’re thinking about painting your kitchen cabinets, be sure to read that post first.
3. Gather the correct painting supplies
While I don’t have a specific brand that I would recommend over others, I do have some important tips for buying the right supplies when painting kitchen cabinets.
This post contains affiliate links. You can find more information by reading my disclosure policy.
Best brush for painting cabinet doors
Again, I am not loyal to one brand here, but I will say that price does matter when buying a brush to use on your cabinets. Although I am usually very thrifty, I reach for the higher priced paint brushes for projects like cabinets. I’ve used Zibra, Woodster Pro, and Purdy paint brushes and they all are superior quality and will give you the best finish.
I prefer to use a 2.5″ angled sash brush for cabinets. It allows you to paint the sides, raised edges, and the face of the cabinet doors easily and with precision.
Best roller for painting cabinet doors
When choosing a roller for painting cabinets, you want to choose the lowest nap possible. This does mean you will need to apply more coats because the roller doesn’t hold as much paint. However, this is exactly what you want to do (see tip #6).
I tested five different paint roller covers side by side next to a sprayed on finish to find the best paint roller. I found that high density foam rollers and 1/4″ mohair nap rollers gave the smoothest finish.
4. Choose the best type of paint for cabinets
This topic is probably one of the most important ones on this page! Choosing the right type of paint for cabinets allows even a novice painter/DIYer to get a smooth finish. The paint does all the hard work for you! I have a complete, extremely detailed post on the best kind of paint for cabinets that will give you everything you need to know.
If you’re trying to decide the best color to paint your kitchen cabinets, here are a few ideas of different Benjamin Moore cabinet paint colors.
5. Order matters! (brush and then roll cabinet doors)
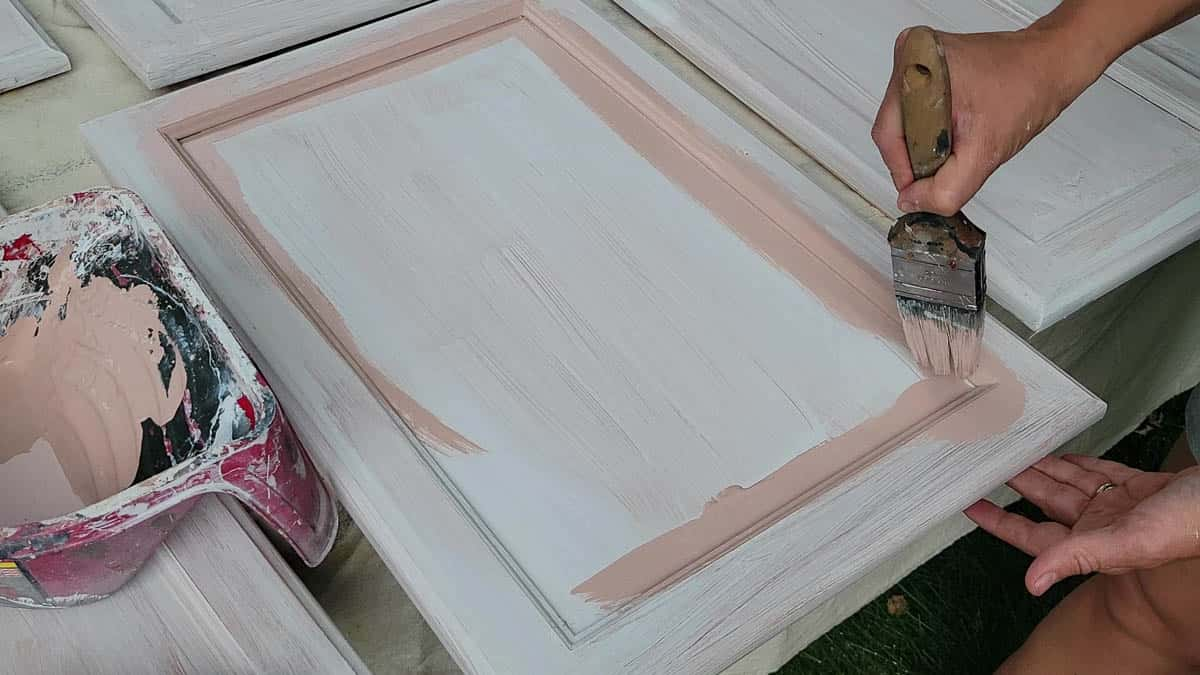
When painting cabinet doors by hand, it’s best to use your brush first, and then to roll over the surface with a roller for a smooth finish.
First, brush the panel raise edges that surround the center panel. It’s important not to use too much paint during this step, because the excess paint will easily pool and drip in the corners if too much paint is used.
I prefer to also use a brush to paint the sides of the cabinet doors as well. Be sure to wipe any excess paint off the bottom of the cabinets right after brushing the sides.
After brushing the raised panel edges and the door edges, use a small roller to roll paint on the center panel and the frame of the cabinet door. It’s important to roll all the excess paint off the roller before painting the doors.
I always condition my paint roller before adding paint which helps to remove any stray fibers. You can see how to prep a paint roller in this post.
6. Use thin coats of paint
In both of the previous steps, I mentioned that it’s very important to use a small amount of paint. In fact, in order to get the smoothest finish on cabinet doors, it’s better to do a few thin coats of paint instead of a couple of thicker coats of paint.
Thin coats of paint minimize brush strokes and texture because there isn’t excess paint that needs to level out when drying. Additionally, thin coats are easier to sand smooth between coats (more on this below).
7. Leave the paint alone
This tip might be the hardest of them all. After you’ve painted a coat of paint on your cabinet doors, just leave them alone. Don’t try to fix little mistakes. Don’t try to remove little bugs that get caught in the paint. Don’t brush over parts that have already been painted.
As soon as the paint starts drying (which in some cases could be within a few minutes), anything you do to touch or touch up the paint is going to show when it dries. Paint levels as it dries, but if you mess with it during this time, it won’t be able to level down properly and will show anything you touch up.
Instead of trying to fix a mistake when it’s drying, wait until the paint has dried and sand away imperfections before your next coat.
8. Sand properly between coats
The best kept secret to smooth finishes on cabinets is to sand in between coats. Lightly sanding after each coat has dried ensures that you’re adding the new layer of paint to a completely smooth surface.
For this step, start with 220 grit sandpaper and lightly sand the whole surface. At this time, you can also sand down any drips or imperfections you may see from the previous coat.
Use a tack cloth to completely remove all sandy dust or anything else that might have got on the surface in between coats. Tack cloths can be found in the painting section of any home improvement store.
For a super smooth finish, after sanding with 220 raise the grit to 400 and lightly sand one more time. This will smooth out any minor imperfections.
9. The final coat counts when painting cabinet doors
The last coat of paint is an important one, because you won’t be able to sand it down after painting (unless you need to in which case you could just add another final coat after that). It helps to make sure that this coat is super light, using the least amount of paint possible.
10. No topcoat needed
If you choose to use an alkyd enamel paint as described in tip #4, you do not need any sort of topcoat or clear coat. It’s helpful not to need a topcoat because it saves time (obviously), but it also saves another step that could result in an imperfect finish.
Alkyd enamel paint can be easily cleaned up with mild soap and a nonabrasive sponge. Even matte sheens of alkyd paint can be cleaned in this way! (I believe Benjamin Moore Advance is the only brand of alkyd paint that offers a choice of a matte sheen.)
If you follow these ten steps, you’ll love the finish on your newly painted cabinets!
Other Kitchen Cabinet DIY Projects
Post by Jenny Leads
Jenny is the voice behind Refresh Living. She has a passion for helping people to create a home they love without spending a lot of money.
We will be painting our kitchen cabinets soon, so this is perfect timing!
Oh that’s great! have fun!
Hello,
Was hoping you could clarify a rough timeline on the drying aspect for doors. I believe one of your blogs talked about curing for a week? So in practical application, does that mean that we lay doors, say, face up, and primer, dry-to-touch, sand, paint coat, d2t, sand, paint coat, etc., THEN wait a week from last application, then flip over and repeat on back side, so no accidental marring? Hope Im not being dense, I just REALLY dont want to screw this up and then go down a rabbit hole trying to fix it. Thank you!
That’s a good question. I always prime and paint (all coats) on the backs of my cabinet doors first. Then, once those have dried for two days, you can flip to do the fronts. Just be sure when you flip them, they aren’t resting on another painted surface (or on a plastic dropcloth that has paint dried on it or something.) For the week of drying time that I suggested, that’s after I’ve installed them after letting the doors dry for 2 days before installing. I keep them open for a week so no surfaces are touching paint to paint. Even though they are dry, they haven’t cured and if the doors are closed the painted surfaces stick and want to cure together. I hope that helps! Best of luck on your project!
You dont need to sand for an ULTRA smooth finish. Instead mix 8oz per gallon by volume of paint additive (aka conditioner or extender) into your paint. For Latex paints Floetrol or M-1 products seemed to work well for me, though I’ve never used a similar product for oil based paints, so I can’t say how they would perform. If you do this you will get ZERO brush or roller marks as it makes the paint lie absolutely flat, and I was simply shocked at the results the first time I did this. I’ve never had a problem with needing to sand for adhesion between coats either. I mean we don’t sand our walls between coats for adhesion, so why would we have to sand cabinets? Lastly, I’ve always used 100% Acrylic Latex paint and not the cheaper Latex paints that have vinyl additives. I can’t speak to how well this works if opting for a cheaper paint, but I suspect it would work as well, and I understand some may have budget constraints.
You’re right, Floetrol does work very well! I personally don’t like using it with water-based alkyd paints, because they already have extra leveling agents added in for a smooth finish. But, it does work so well to extend dry time and give a SUPER smooth finish. I 100% agree with using acrylic or acrylic-latex paint. It makes a huge difference in paint quality!
Hello Jenny,
I’m updating my kitchen and recently stripped all my cabinet doors. they are cleaning up perfectly. However, the actual framework is giving me problems. I didn’t (and really can’t) strip it. The kitchen had an oil-based paint-on stain over the varnished wood so I used the Zinsser Smart Prime. I just check on how it’s drying and the primer comes off with just the most gentle of scratches with my fingernail 😭 Its been over 24 hours since I put on the second coat. Does it just need more time to dry? Have you experienced this? The primer says it reaches full hardness in 7 days but I’d hate to wait that long only to find it didn’t work…
Hi Elizabeth. I’m so sorry that is happening because that’s SO frustrating. I’ve never had that happen with Smart Prime. I have had it happen with other primers, (like Zinsser 123) so I know the feeling. However, I haven’t had the problem with Smart Prime or Cover Stain. The only thing I’m wondering is the time between the two coats. It could just be that is does need more time to fully cure. Or maybe there could have been something on the surface that’s making the primer not adhere? (But I think you said they cleaned up well?) It looks like it’s been a week since you reached out – I’d be really interested to hear what happened. Did it end up curing correctly?
Best way to paint OAK kitchen cabinets and hiding the oak grain?
If you have heavy grain and want to hide it for a smooth finish, you’ll need to apply a grain filler before priming. Aquacoat is a common brand that works well. But, I’ve also used watered down drywall mud (per the recommendation of my neighbor who’s a professional painter) to fill the grain. It sands down so much easier than the grain fillers and works so well!
Why the settling in the cans even if you leave it set for a week? It is a real stiff texture and very hard to blend in? Webought two different gallons yesterday from Lowes brought them home and tried to stir them and behold there was a real stiff white sediment in the bottom. What is it and why is it there?