
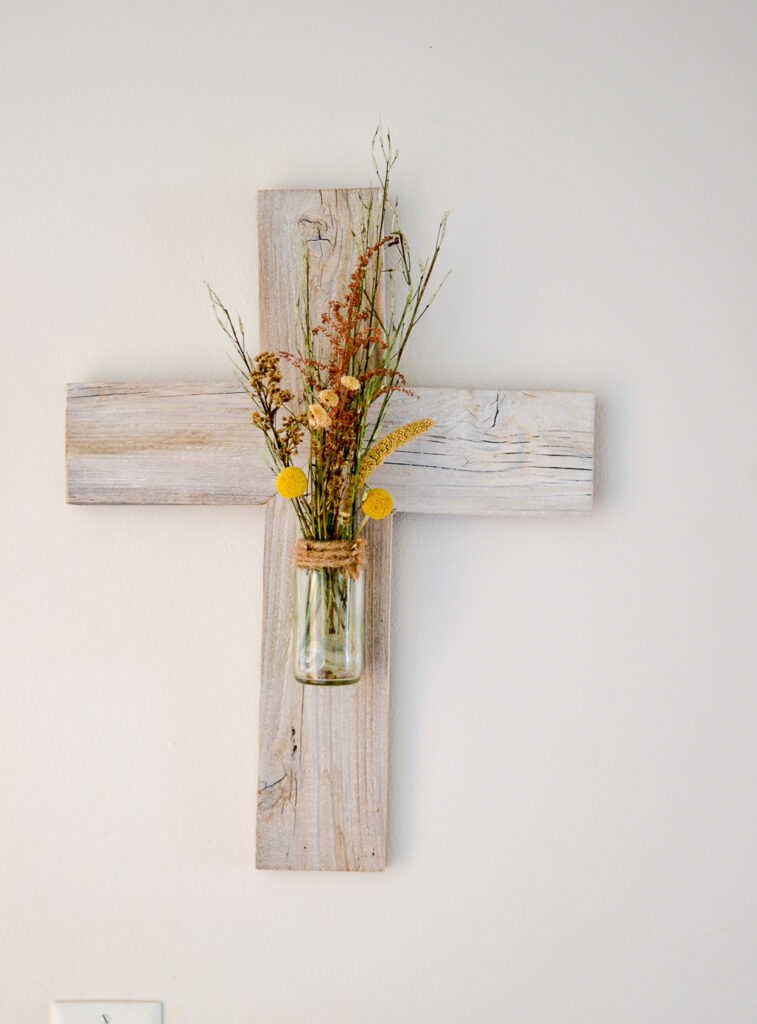
Wooden Cross (Easy DIY from Scrap Wood)
Use reclaimed wood or hardwood to make this easy DIY wooden cross with a flower vase.
This wooden cross is first and foremost an expression of your faith, but it’s also a beautiful way to decorate your walls!
You can use real of fake flowers and change them out throughout the year for different seasons. Best of all, this wood cross is super easy to make and requires very minimal woodworking skills.
Reusing old wood and glass jars in one project?! Yeah, I agree, it doesn’t get any better than that to those of us that love to reuse stuff that is otherwise destined for the garbage!
This post contains affiliate links. You can read my full disclosure policy here.
Supplies to Make a Wood Cross
- scrap wood approximately 3/4″ – 1″ thick and 3″-4″ wide (old fence pickets or 1 x 4s work well)
- 2″ metal mending brackets
- Kreg pocket hole jig (optional)
- glass food jar
- picture frame hanging hook
- picture frame wire
How to Make a Wooden Cross
Making a wooden cross only requires only a few cuts and a few screws!
1. Cut the wood to size

First, grab your piece of wood. To make a cross that ends up being 18″ tall (which is how big the cross shown in the images is), you’ll need to start with a board that is 35″ long. You can obviously use any type of wood here. I chose a piece of reclaimed pine, but I think it would look beautiful with a piece of oak wood as well!
Then, cut down the wood into four pieces – three pieces all the same length (7″) and one piece that is longer (11″). You can really use any measurements you like for this part. If you end up using wider wood (I used 3.5″ wide pieces), you can make your pieces longer for a larger cross.
2. Cut the angled ends
Measure and mark the halfway point on the width of each board. My preferred way to find the halfway point without any math is to take a piece of paper, trim it down to the width of the wood, and then fold it in half. Faster for me than measuring and dividing!
Next, cut each side at a 45 degree angle from the midpoint mark to the edge of the board. Doing this is a miter saw is the fastest way, but you would also use a regular saw as well. Just use a rafter square or protractor to mark the 45 degree line.
Cut the other side with an opposite 45 degree angle to create the pointed end on each board.
3. Stain, paint, or finish the wood
I whitewashed the pieces (using this method for whitewashing wood) to lighten them up and give them a bit more dimension. Of course, you could finish the wood however you like!
4. Attach the boards together to form a cross
A Kreg Pocket Hole Jig works really well to connect these flat pieces of wood in the center, but metal mending braces can also be used to attach the boards together on a wooden cross.
How to attach the boards together using a Kreg Jig
My wood was 5/8″ thick, so I set my drill bit to that length. Then, I rested one of the cut sides onto the jig and drilled one hole into each of the boards.
Here is a look at all the recessed holes ready for the screws. Just be sure to add some wood glue between each of the joints before screwing them together.
How to attach the board together using mending brackets
Don’t have a Kreg Jig? Using these metal mending brackets will work just as well! These brackets will come with screws, but just be sure they aren’t too long for your project. You may need to use shorter screws so they don’t break through the front of the board.
Also, be sure to predrill pilot holes into the wood. This keeps the wood from splitting when you screw in the screws.
5. Attach the glass jar (optional)
You can use any type of glass jar for this. I used an old glass food jar and used this method on how to remove labels from glass jars. A pint sized mason jar also works well for this size of wooden cross.
To hang the glass jar, wrap some 20 gauge wire (or picture frame wire will also work well for this) around the neck of the jar, but underneath one of the screw rings so it doesn’t slip. Form the wire into a thin loop, twist the ends, and then snip with wire cutters. Then, wrap twine around the lip of the jar to cover the wire.
Nail a small picture frame hook to the front of the wooden cross and slip the loop on the jar over this hook to hang it.
This DIY wood cross is inexpensive to make and it’s so easy to change out the look depending on the season. I personally keep fake flowers in mine, but fresh flowers would be amazing! A couple of rocks or glass stones help to hide the fake stems.
Post by Jenny Leads
Jenny is the voice behind Refresh Living. She has a passion for helping people to create a home they love without spending a lot of money.
How beautiful for Easter and beyond. Love it! Sharing on G+ Thank you for sharing on Merry Monday! Hope to see ya next week!
Kim
This is just gorgeous! I have a kreg jig mini that I’ve used once…now I’m thinking that I should have invested in the one that comes with a guide. Great tutorial!
Great directions with images!
This is so cute! Thanks for sharing at #HomeMattersParty!
You cross is wonderful I love that you used the old picket fence.
Thank you for sharing on Oh My Heartsie Girls Wonderful Wednesday #omhgww, your post is being featured this week and will be will also be pinned on this week on Pinterest and shared to Facebook.
Please join us to share again!!
Now I hope you enjoy the little boost, and stop by again to share.
Have a great week!
Karren
THanks so much for the feature, Karren!
Jenny this is so pretty! I just wanted to let you know you are one of my features at TFT today! I hope you will stop by and say hello and link up again! Happy Spring!https://followtheyellowbrickhome.com/easter-inspiration-at-thursday-favorite-things/
I’m a busy mom of 3 and don’t want to make one.. can I buy one?? 🙏🏻😄
Yes, I actually have an extra one that I’ve been wanting to find a good home for. Will you send me an email or fill out my contact form on this page https://refreshliving.us/welcome/
Kristynwentz@ymail.com Yay!