
How to Paint Furniture for a Beautiful Finish
Follow these easy steps to get a smooth, durable finish when painting wood furniture. Whether you’re a beginner or have painted furniture in the past, you’ll find something helpful in this post about prepping, painting, and finishing wood furniture.
It’s entirely possible to paint wood furniture right the first time and create a finish that will last, even if you’ve never painted a piece of furniture (yet)!
I was SO terrified the first time I thought about painting a piece of furniture. I had a fear that I was going to ruin everything as soon as I started painting.
And, now that I’ve been talking about painting furniture for awhile, I’ve learned that many other people have this same fear from all the comments and questions I receive about it.
In This post You’ll find:
I can safely say I’ve refinished over a hundred pieces, used a variety of different types of paints and styles of finishes, and made my fair share of mistakes along the way.
Being a teacher, I’m a firm believer in the power of learning by doing, but it’s really difficult to start doing something new if you don’t feel safe. This post is my attempt to calm your nerves and provide you with easy to follow steps on how to paint wood furniture so you can confidently pick up that paint brush and tackle that project!
This post contains affiliate links. Please read my full disclosure policy here.
How to Paint Wood Furniture
It’s easy to get beautiful results when painting wood furniture by following these easy steps: cleaning, sanding, priming (if necessary), painting and top-coating.
Step 1: Clean the Furniture
The first step is to clean your furniture piece. This might mean simply removing some dust, or it could entail removing grime and grease and other unknown substances.
No matter what type of paint you are using on your furniture, you always need to clean the piece first! Skipping this prep work will result in peeling, flaking, or rough textures in the paint.
Steps to Clean a Piece of Furniture
To clean furniture that is going to be painted, spray the cleaner on the surface. Then, use a non-abrasive sponge to clean the surface, paying attention to cleaning in nooks and grooves in the piece.

I personally like using the abrasive side of a non-scratch kitchen sponge. It has a lot of grit to help clean, but it won’t scratch the surface of the wood.
Then, use a damp towel to wipe away any excess cleaner. Follow immediately with a dry, lint free towel to dry the surface.
Best Products for Cleaning Furniture
Depending on the level of dirt and grime, different levels of cleaner may be needed on your furniture before painting.
Gentle & Mild Wood Cleaners
Murphy’s Wood Oil Soap
Murphy’s Wood Oil Soap can be used safely on wood to clean and revive the finish, or before painting. It comes in a spray bottle that is already pre-mixed, or a concentrated formula that you add a little water to to create the solution.
DIY Wood Soap: Blend of Vinegar, Dish Soap, Oil and Water
Mix together 1/4 cup vinegar, 1/4 cup warm water, 1/2 teaspoon dish soap and a little bit of olive oil. Mix this up, dip in a cloth, and apply it to your furniture to clean it before painting.
Heavy Duty Wood Furniture Cleaners
Krud Kutter
Krud Kutter is a degreasing cleaner that will clean away oil, dirt and grime from furniture. It’s also great for cleaning kitchen cabinets before painting!
TSP Substitute
TSP Substitute is my favorite cleaner for heavily soiled pieces of furniture. You can buy it in a pre-mixed spray bottle or a powder form to make your own cleaning spray (this is definitely the cheaper route). TSP Substitute will do the same thing as Krud Kutter, it’s just usually a little cheaper.
Step 2: Lightly Sand
Everyone always wants to know how to paint furniture without sanding. The only paint I ever would think of skipping the sanding step with would be chalk paint.
And even then, I’ve become so accustomed to lightly sanding before painting, I do it every time before I paint a piece of furniture. It literally takes five minutes, and it ensures you’ll have a smoother finish that sticks to the piece.
To lightly sand your furniture before painting, use 220 grit sandpaper to lightly scuff up the surface.
A sanding sponge works great for this, but since they are expensive to continue to buy new, I wrap a piece of sandpaper cut in half around my old sanding blocks.
Please note, you are not trying to remove the finish here nor sand down to bare wood. Just run the sandpaper over the entire surface with slight pressure from your hand. It’s always best to sand in the direction of the wood grain as well.
Use a tack cloth or a slightly damp lint-free cloth to wipe away any excess sanding dust.
Step 3: Prime (if needed)
Most of the time, you don’t need to prime furniture before painting furniture. However, a coat of Shellac primer (or synthetic shellac primer) will ensure your paint sticks to the surface and will prevent all bleed through.
Basically, here are the main reasons you might need to add a coat of primer before painting:
- You have a piece that is going to bleed through the paint (wood tannin bleed through, stains, or odors).
- You are painting over a piece that has been previously painted (especially if it’s chipping or if the surface is glossy).
- You are painting over slick laminate or other shiny surfaces (like IKEA furniture).
There are three main types of primer that work well for furniture – oil-based, shellac-based, and water-based. Here are all the details on each of these types of primer for furniture.
If a coat of primer is needed, there are options for both spray primer or brush/roll on primers. Either option will work fine, as long as you’ve selected the right type of primer for the issue.
Do you need primer with all-in-one furniture paint? Yes, even “All-in-One” furniture paints (like Amy Howard, Beyond, Heirloom, Silk and ALL others) sometimes need primer. They can’t hide wood tannin bleed or oil-based stains on furniture, so if you find something bleeding through your all-in-one paint, you need to use a high hide primer (more details in the post linked above).
Step 4: Choose Your Paint
There are a lot of factors that go into the type of paint you should use for your old piece of furniture: cost, the look you are trying to achieve, and the condition of your piece. I’ve used a lot of different types of furniture paint, and tons of different brands, and each one gives a slightly different finish.
I’ve sorted out and organized the differences between all of these paints and give the pros and cons of each one in this post on the best paint for furniture.
I compare all-in-one paint, alkyd enamel paint, chalk paint, milk paint, normal wall paint (all water-based paint) and oil-based paint. Plus, you’ll find the pros and cons and tips for using each of them on furniture.
Step 5: Paint with a Brush and Roller
Using a paint sprayer is the best way to get a smooth finish on furniture, but if you are new to furniture painting, you probably don’t have one of these laying around. I know I sure didn’t when I started out!
However, it is still quite easy to get a smooth finish on furniture using only a brush and a foam roller.
Best brush for painting furniture
I am not loyal to one brand here, but I will say that price does matter when buying a brush to use when painting your furniture. Although I am usually very thrifty, I reach for the higher priced paint brushes for painting wood furniture.
I’ve used Zibra, Woodster Pro, and Purdy paint brushes and they all are superior quality and will give you the best finish.
I prefer to use a 2.5″ angled sash brush for furniture. It allows you to paint edges and corners well, but also flat surfaces as well.
Best type of roller for painting furniture
When choosing a roller for painting furniture, you want to choose the lowest nap possible for a smooth finish. This may mean you will need to apply one extra coat of paint because the roller doesn’t hold as much paint. However, this is exactly what you want to do (see my tips at the bottom of this post).
I’ve used both foam rollers and 1/4″ nap rollers and don’t really have a preference between the two.
Update: I tested the six main types of rollers side by side and found the two best paint rollers for the smoothest finish.
Steps to Apply First Coat of Paint to Furniture
When painting your first coat, aim to use a thin coat of paint. Work in sections, painting one part at a time. (For example, paint the side of a dresser, then the front, then each of the drawers, then the top.)
For each section use your brush to trim any corners or edges. Then, use your roller to paint the flat surfaces. Make sure that none of the paint has started to dry when you roll over it. This makes it harder for the paint to level and dry smoothly.
Step 6: Sand Between Coats
After the first coat of paint has dried (usually a few hours of dry time is enough, as long as you did a light coat as suggested above), use 320 grit sandpaper to lightly sand the piece.
At this time, you can sand away any drips or brush marks. Then, use a tack cloth to remove any leftover sanding dust. This step is the single most important factor in achieving the smoothest finish on a piece of furniture.
Apply a second coat (and a third coat if needed) until your piece is covered.
Step 7: Add a Topcoat (if needed)
Depending on the type of paint you choose, you may need to apply a topcoat. The post I mentioned above about the best kind of paint for wood furniture will break down which types of paint require a topcoat, but for now, here are a few general guidelines.
| Topcoat ALWAYS needed | Topcoat SOMETIMES needed | Topcoat NOT needed |
|---|---|---|
| milk paint | acrylic paint | alkyd enamel paint |
| chalk paint | some “all-in-one” paints | oil-based paint |
| some “all-in-one” paints |
When choosing a top coat, I would always recommend using a water-based topcoat or a wax. Oil-based topcoats (like polyurethane) will yellow over time which doesn’t work well with painted furniture.
Using a water-based polyurethane or a clear acrylic topcoat will give you a clear, durable finish that helps your painted furniture withstand bumps and use.
Furniture wax gives a hand rubbed, matte finish but still protects the paint. I love using wax when using milk paint or chalk paint because it compliments the natural, organic look of those types of paint.
I am working on a detailed post of my favorite brands and types of topcoats to use on furniture. I’ll be sure to link it here once that post is complete!
Following the steps above will allow you to easily refinish any piece of furniture! If you’re looking to paint your front door, this post gives the step by step process on how to spray paint a front door.
Below, you’ll find a few more tricks that help to best finish when painting furniture.
Top 5 Tips for Painting Furniture
1. Less is More
Using less paint and painting multiple light coats gives the smoothest finish in the end. When you have less paint on your brush, it is able to level more evenly when drying. Usually, three light coats of paint is enough to thoroughly cover your piece.
I always recommend using more thin coats of paint than trying to do less coats by applying more at a time.
2. Paint it On – Leave it Alone
Brush your coat of paint on the piece and then let it be. If you try to over brush, or brush over a part that has already started to partially dry, you’ll actually create more brush strokes and a stickier mess while trying to paint.
I especially find this to be the case with chalk paint, because it dries so quickly. Just paint a stroke and let it be.
3. Sand Between Coats for a smooth finish
Use 320 grit sandpaper to lightly sand between coats. Then, use a tack cloth to remove any leftover sanding dust. This step is the single most important factor in achieving the smoothest finish on a piece of furniture.
4. Watch for Drips
When painting edges, legs and corners, watch out for drips on the other side of the piece. Paint a side and then run your brush along the other side to catch any excess paint that might be dripping or sagging on the other side.
5. Keep the Leftover Paint
Put the leftover paint in a small glass jar and label it with the piece of furniture you painted. I keep this handy in case I need to touch up a small spot down the road.
Thanks so much for reading! I hope you this post helpful in some way and you can walk away with the confidence to just give it a try! If you run into some snags along your furniture painting journey, I’m only an email away. I might be able to help you out – there’s almost always a way to “fix it”. Good luck, and happy painting!
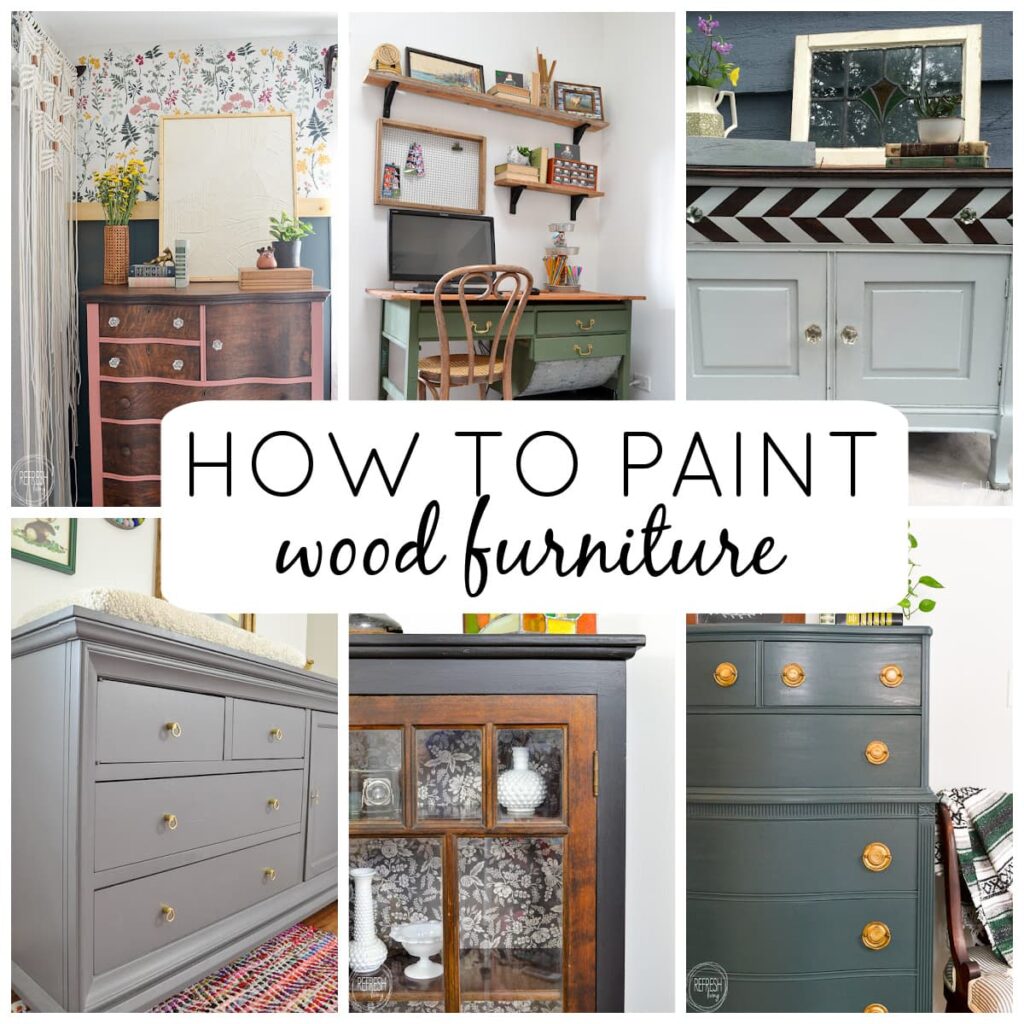
A Few Pieces of Painted Furniture
Here are a few of the pieces I’ve recently finished for our home. You can click on the image to view the full tutorial.
Post by Jenny Leads
Jenny is the voice behind Refresh Living. She has a passion for helping people to create a home they love without spending a lot of money.
I may not paint furniture in the near future… but I found reading this was encouragement for the possibility!
Thanks so much, Su! I bet you can find someone nearby that can paint it for you if you want something done. 😉
Your advice and encouragement is greatly appreciated, thanks for a great read!
Thanks so much, Trish. I’m so glad you found it helpful!
Great information! Look forward to reading more from you! Thank you & happy painting!
Hi Pamela. Thanks so much for your kind words and for taking time to leave a comment!
Just found you Jenny! Your advise is super helpful! THANK YOU!!! And I love your work! Looking forward to learning and seeing more!
Thanks so much, Cheryl! I’m glad you found some helpful information. 🙂
About to try my first piece. I want to paint a buffet a deep grey with a gel or stain in black over the top to accent all the details. Any advice on grey colors to look at? Thanks so much.
I love the deep gray color from General Finishes Chalk Style paint in Slate Gray. It does read a tad bit blue, but I think dark glaze over top will darken it more. That’s the color that comes to mind first, but I know there are a ton of other pretty dark grays out there!
Hi Jenny, thanks for a super helpful article. In your view is it ok to use artists acrylic paints for furniture? Many thanks!
Hi Pam! Yes, I’ve used artist acrylic paint for furniture on smaller pieces. Sometimes I’ve found the adhesion not always to be as good on finished wood as some of the acrylic paint especially made for furniture, so I would recommend a coat of primer beforehand and it will be fine!
And here I’ve always only used one type of brush, here’s to hoping I get better painting results after following your tips
I hope so too! I’m always so amazed at how much a good brush can make things so much easier!
Wonderful!!! so heplful!! Thank you !!!
I’m planning to paint a dresser & shelves for a child’s bedroom. Your tips for best paint, primer, roller & general painting tips have been so helpful! Thanks for being so honest and thorough in your reviews/tips!