
Refinished Vintage Wood Dresser
There was beautiful wood grain hiding under the old finish on this dresser! This dresser started with a dark, old finish that hid the wood grain. After some wood stripper and new stain and topcoat, it looks just like new with a beautiful natural woodgrain.
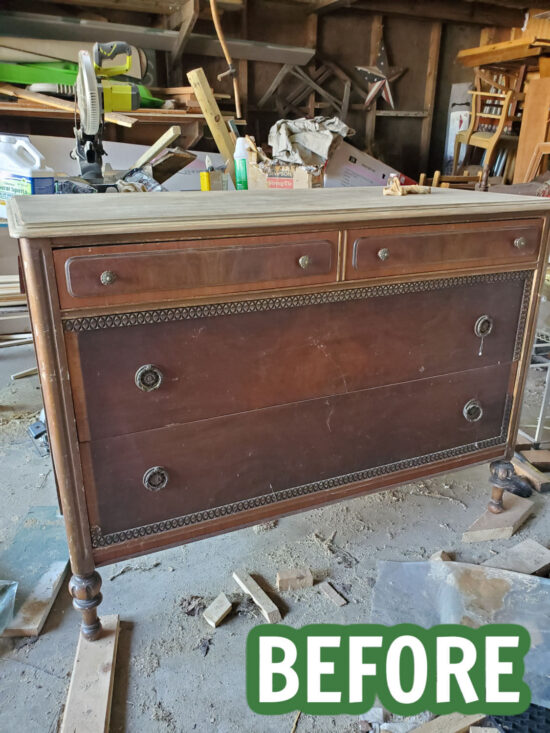
I picked up this dresser several years ago at my favorite place to shop – the last day of an estate sale when everything is 50% off! This dresser ended up being $40, and although it had some decorative trim missing and the finish was in pretty dingy shape, it had solid bones and a design I loved.
To refinish this piece, I first stripped the old finish off the entire piece. Here is my full tutorial on the best method for furniture stripping. I always start with stripping the top, and then after finishing that part, I move on to the sides and drawers.
This dresser ended up needing two coats of stripper on the top, and only one on the sides and drawers.

You can see the finish came off nicely from the drawers after that one coat of stripper. Look at the woodgrain that was hiding under the dark stain! It was only at this point that I realized the dresser was made with mahogany veneer.
To give the wood a consistent finish and remove any old finish missed from stripping, I used my orbital sander with 220 grit sandpaper to lightly sand all parts of the dresser.
After sanding, the finish looked uniform and ready to be refinished!
I chose to use Natural colored wood stain which only slightly darkened the wood. I could have also just skipped right to the top coat if I wanted to keep it a completely natural mahogany color.
For the finish, I chose plain old oil-based polyurethane in satin finish. I am working on a full post comparing oil-based polyurethane and the newer water-based polyurethane finishes that brands have recently developed. They definitely give an entirely different finish. One thing to note for now, oil-based polyurethane will darken the finish. I knew this and purposely chose it to accentuate the wood grain.
Can we just pause for a moment to check out that woodgrain?? The photo does not do this vintage beauty justice, because it’s even more gorgeous in person.
I tested out four different ways on how to clean brass hardware with these beautiful brass knobs and pulls. You can see how each of the DIY brass cleaners stood up to Brasso when it came to cleaning power.
Although the stripping process is slightly more time-consuming than painting, I think it’s totally worth it to reveal the natural beauty of wood hiding behind gunky old finishes. Yes, she still would have looked pretty painted, but I am in love with the wood shining through on this one.
Love refinishing furniture? You might enjoy these posts:
Post by Jenny Leads
Jenny is the voice behind Refresh Living. She has a passion for helping people to create a home they love without spending a lot of money.
JUST GORGEOUS!!! Congrats! Soo worth the wait!
Absolutely stunning! So nice to see someone’s work bring beautiful wood back rather than covering it up with paint…
Thanks Marcia. I find myself almost always trying to restore the wood finish if it’s in good shape and I’m able to, especially on older pieces!
Absolutely beautiful piece! Did you use the same Natural finish on the entire piece?
Hi! Yes, I used natural stain and then oil based polyurethane on the whole thing.
I am about to do my first stripping- re-staining job on this AWESOME vintage vanity mirror I got for free, and this blog has given me full confidence I’ll be able to do it. I reached out to some professional restoration places cause I was nervous I would ruin it and they quoted me $2,500 bucks! No way! Now I feel confident I can do it myself!
Now just debating wether I should go with wood stain in the natural color and then finish or just do the clear wipe on matte poly… don’t know if you might have a suggestion for which finish I should use? Also in the stripping video you mentioned you let it sit for 24 hours, but in another it mentions I could start scraping off after 30 minutes…. Does letting it sit for 24 hours just make it easier to remove? Or is it just whenever you have the time type situation?
Thanks again for all this info, so excited!!!
Hi Brooke – yes, you’ve got this! As far as the time to let it sit, Citristrip says it can be stripped in 30 minutes. Sometimes, this is enough time, other times it’s not even close. I prefer to cover it with plastic wrap and just let the stripper work. Usually I let it sit 24 hours because that’s the next time I’m able to work on it, but overnight should definitely do the trick on stubborn finishes. (The longer it sits the easier the finish is to remove, as long as it stays covered. But anything over 12 hours won’t make much difference.) For the color, see how it looks after stripping and sanding it. Natural stain will definitely darken it, and then any oil based poly will darken it more. Using just oil based poly will still darken it slightly. If you love the color after stripping and don’t want to darken it at all, use a water-based polyurethane. (I am working on a post comparing these finishes on a bunch of different types of wood because I have such a hard time deciding what to choose every time. Best of luck on your project! I’d love to see it when it’s done!