
Reuse an Old Table as a Raised Garden Planter
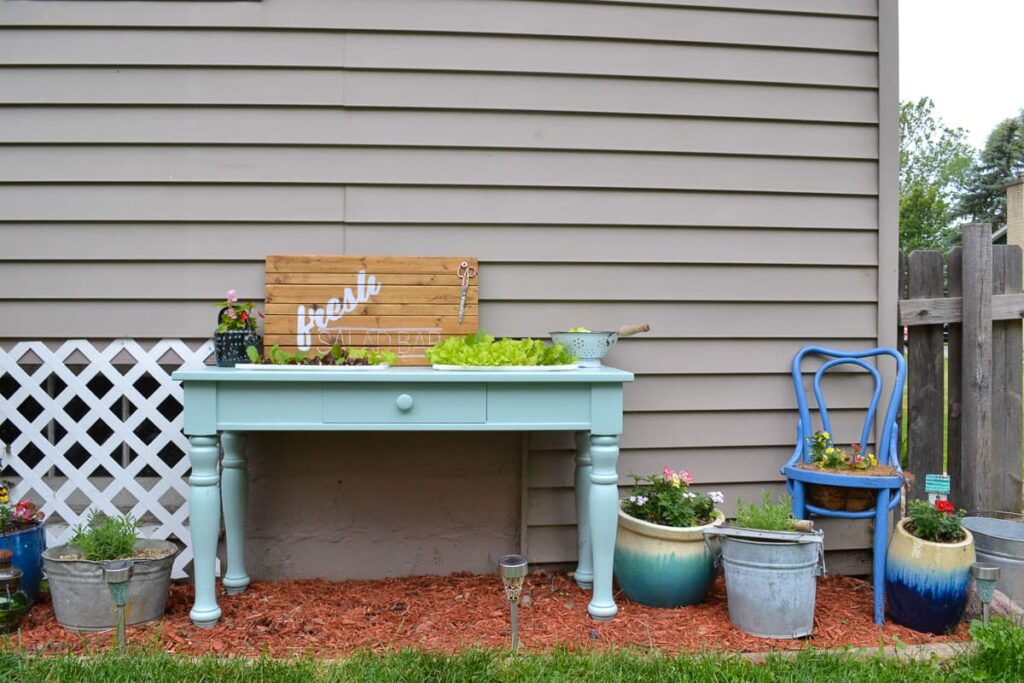
Reuse an old sofa table to make an outdoor raised garden bed perfect for growing herbs or greens!
It’s easy to make a DIY raised garden bed by starting with a old piece of furniture. This version uses IKEA bins that work perfect for short rooted plants like salad greens, but you could also cut holes to fit larger pots for deep rooted flowers or vegetables.
This post was originally published in 2017 and was updated in 2024.
My brother and sister-in-law offered me this solid wood sofa table. I almost passed on it because I didn’t really want to refinish it as a sofa table, plus I had no room in my overcrowded garage.

After seeing the height of it, and seeing some waist height raised garden beds at the home improvement store, I realized I could make this into a little raised planter.
How to Add Planting Containers
I started with two IKEA bins that I stole from my kids’ basement storage racks. Now, these bins are quite shallow, so only certain vegetables, like salad greens, would grow well in them.
You could also use galvanized bins, which tend to be deeper, or even clay or plastic flower pots, to grow other vegetables or flowers.
Drill holes into the bottom of the container so the soil can properly drain.
Trace the bottom of the bins on the top of the table. This will give the smallest perimeter of the bin so the lip will sit over the edge and hold the bin in place.
If you use flower pots or galvanized tubs, trace the bottom of the bin and then flip the bin over and lightly trace (in pencil) the top of the bin. When cutting the holes in the next step, be sure to cut between these lines so the bin can sit in the hole without falling through.
Use a circular saw (for straight cuts) or a jigsaw (for curved cuts) to cut holes in the top of the table.
This table had a small drawer, but since the bins were going to be lower than the drawer, I had to remove the drawer. I just sawed off the drawer pieces from the front, and then wood glued and nailed the front plate in place from both the top and the bottom.
How to Paint Outdoor Wood Furniture
In order for wood furniture to withstand the elements of being outside, it’s important to use a paint that is made for exterior use and to properly prepare the piece for painting.
First, sand the wood with 220 grit sandpaper. This scuffs up the surface and helps the paint adhere. For adding sticking power, use an exterior grade wood primer.
I did not use primer on this table and the paint held well for about two years. (I stupidly left the table out for one entire winter, and after that the paint started peeling. If I had brought it inside, the paint would have lasted longer.)
Either way, if you want your paint to adhere very well, I’d suggest taking the extra step to prime it first, before painting. Or, you can use a chalk paint (which sticks very well) and then seal it with an exterior grade clear coat.
I used DecoArt Outdoor Living paint which is rated as an exterior paint. You can also use any exterior house paint from the hardware store as well for the paint color.
My two oldest love to paint, so they helped me paint all parts of the table (including the underside to help it withstand any water). I applied three coats to help with durability.
The table sits under a small roof overhang, so it does get wet, but it’s still somewhat sheltered. The paint stayed in tact for the first and second year, but then when I forgot to pull it inside over the winter and it sat in the snow, the paint started chipping and the edges of the cut part of the table started taking in water.
If I were to do it again, I would primed and I would have applied Flex Seal or water penetrating sealer along the interior cut edges of the table to help it last longer.
The bunnies left these greens alone, so I’m guessing the table was high enough off the ground to keep them away.
Want to make sure you don’t forget about this idea? Pin it for later! (Many thanks!)
Do you like to refinish furniture? Check out my post about the best kind of paint for furniture.
Here are a few other gardening DIY projects:
Post by Jenny Leads
Jenny is the voice behind Refresh Living. She has a passion for helping people to create a home they love without spending a lot of money.
LOVE LOVE LOVE THE RAISED GARDEN BED!!!!
Thanks so much, Cheryl!!
What a great idea!
Thanks, Nancy!
You did a beautiful job! I love it! Hope the deer don’t come over for a quick salad. Happy weekend, Bev
You are totally right, Bev; it’s the perfect height for deer, isn’t it?! I think they generally stay out of our yard with our two big dogs, but now with this lettuce bar right at their height, who knows!
A ‘Salad Bar’ … that’s just too clever!! And the colors of the lettuce contrast so nicely with the paint. As far as I can see, the only things missing are the plates, forks, and vinaigrette. What time is lunch?
Hehe, you’re right about that! Thanks for taking the time to comment.
Very clever idea. It turned beautiful. What a nice way to teach children about gardening
Thanks, Amanda!
Unconventional is quirky, and in my book quirky is cool! Love it Jenny, it’s always great to reuse what you have on hand! Inviting you to share it at #FridaysFurnitureFix over at my place!
Thanks, Brenda! I will definitely link up this week. 🙂
You gave me an idea! I wonder if this can be accomplished with an old school desk?
Cool idea! I think it would work, and look so neat!
fabulous upcycle, now every piece of furniture has new possibilities! thanks for sharing on craft schooling sunday!
This is adorable! Love it! Pinned! Thank you for sharing on Merry Monday! Hope to see ya next week!
Kim
This is one good idea.
I love the repurpose of the table. I wish I had a way to cover it. I would definitely be searching for a table to upcycle for my lettuce. Thanks for sharing on Sunday’s Best. I’ll be Pinning this post.
What a fabulous idea. It is so cute. Stop by Over The Moon Party since you are being featured.
Hugs,
Bev
Such a clever repurpose project! I love the color. This post will be Featured at the new Merry Monday party. Can’t wait to see what you share with us next. Love your creativity.
This is so adorable, it’s my feature, it’s also perfect for Earth Day. I too am making a raised bed for Earth Day!. Great minds think alike.
Maria
What a super clever use of an old sofa table. I will be featuring this tonight at my Swing into Spring party that opens at 8pm EST. Please stop by and pick up an I’ve Been Featured button. Thanks. http://diybydesign.blogspot.com
Awesome idea! I am featuring this post today at Thursday Favorite Things. I hope you will come over and party with us again!
https://followtheyellowbrickhome.com/spring-flowers-garden-style-at-thursday-favorite-things/